


Delivery Head Assembly
1 Remove the left cover (see Figure 6-65).
2 Remove all paper bins and the blind cover (see Figure 6-86) or the stapling
unit (see Figure 6-91).
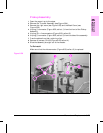
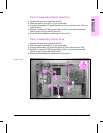
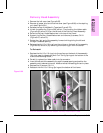
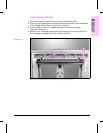
3 Release the top of the Metallic Tape (see Figure 6-79).
4 Unlock the cable clip (Figure 6-66, callout 1) and unplug the ribbon cable
(Figure 6-66, callout 2) from the left end of the Delivery Head Assembly.
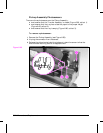
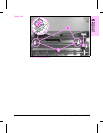
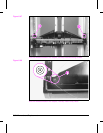
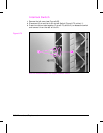
5 Raise the Delivery Head Mechanism to the top of the frame.
6 Support the Delivery Head Mechanism and remove (4) screws, CH111
(Figure 6-67, callout 3).
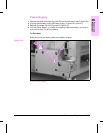
7 Rotate the right end of the assembly forward while guiding the left end
through its access opening.
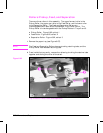
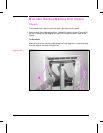
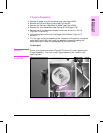
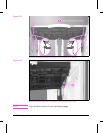
8 Release the Anti-Curl Strings from the pulleys on the back of the assembly
(Figure 6-68, callout 4) by removing the mounting pin form the center.
To Reinstall:
1 Replace the Anti-Curl Strings into the pulleys on the back of the assembly.
(You may need to release the Anti-Curl String Springs at the bottom of the
frame to have enough slack.)
2 Carefully replace the ribbon cable into its connector.
3 Insert the left end of the assembly through its access opening and position the
assembly onto its elevator mounts. Make sure that the locating pins are in place.
4 Replace the (2) screws, CH111.
5 Reattach the Anti-Curl String Springs at the bottom of the frame.
Multi-Bin Mailbox/Mailbox with Stapler, Delivery Head Ribbon Cable
Figure 6-66
6
Removal and
Replacement
Removal and Replacement 6-81