


148 MFP disassembly/assembly ENWW
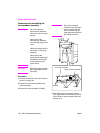
Replacing the scanner motor
(M11)
CAUTION Be sure the power cord has
been unplugged from the
wall outlet.
Procedure
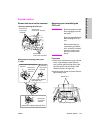
1 Remove the ADF unit, original stopper
plates (left and rear), scanner glass, and
top cover (right, left, front center, and rear
center). See “External section” on
page 132.
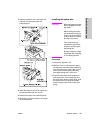
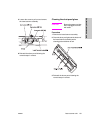
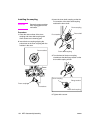
2 Remove one connector (CN639) from the
auto paper timing PS (PS51).
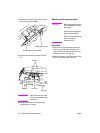
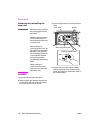
3 Remove the hinge mounting plate (rear
side) from the scanner unit. (12 screws)
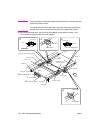
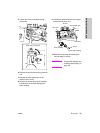
4 Remove four screws from the scanner
motor (M11), then remove the scanner
belt and the scanner motor.
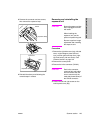
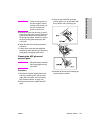
5 Install the scanner motor (M11) and the
scanner belt. Tighten the scanner motor
loosely with four screws.
CAUTION Make sure to install the belt
in the middle of two pulleys.
Also make sure that the
belt is not placed on the
edges of pulleys, or that it
is running off from the
pulleys.
Tighten the motor by first
tightening the screw and
then give it one turn to
loosen slightly.
Connector(CN639)
Scanner Belt
Pulley