


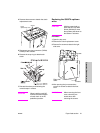

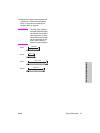


ENWW Paper feed section 29
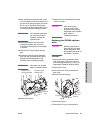
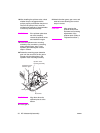
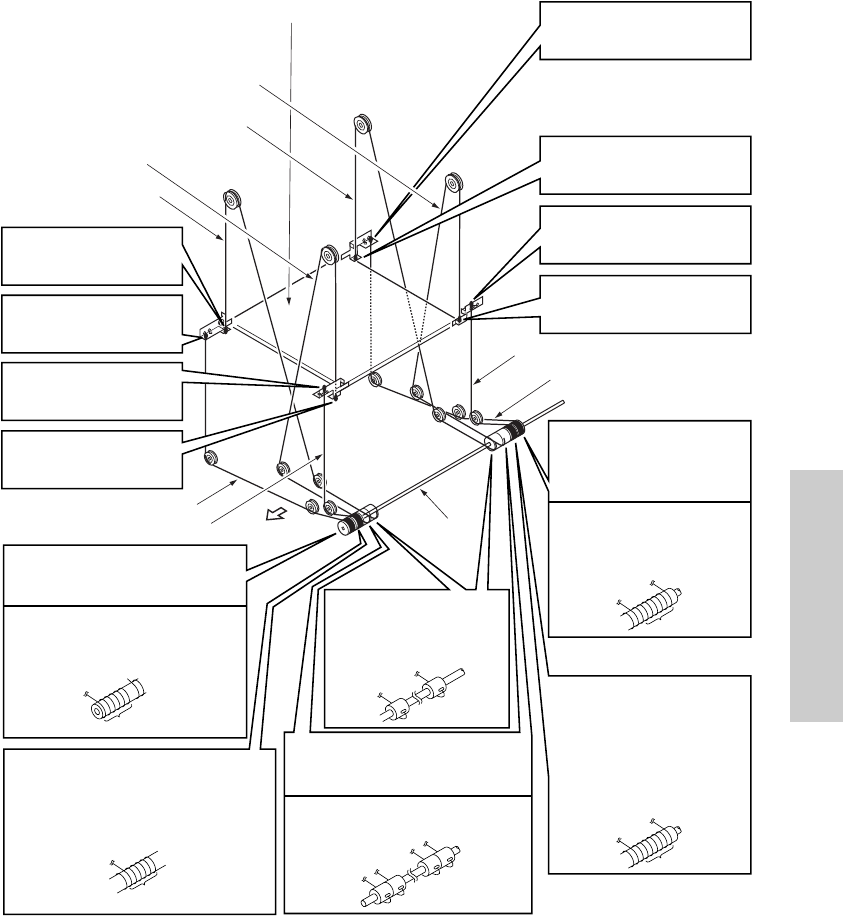
HCI disassembly/assembly
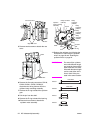
Installing the up/down wires
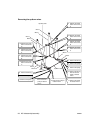
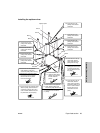
FRONT
Up/down plate
Wire C
Wire C
Wire D
Wire D
Wire A
Wire A
Wire B
Wire B
Up/down
shaft
6 turns
6 turns
6 turns
6 turns
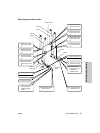
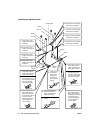
7. Insert wire D in the
pulleys, then attach a
metal ball.
15.Insert wire A in the
pulleys, then attach a
metal ball.
12.Insert wire B in the
pulleys, then attach a
metal ball.
10.Insert wire C in the
pulleys, then attach a
metal ball.
13.Insert wire A in the up/down
shaft, attach a pulley, and
secure the pulley with an E-ring.
14.Wind wire A around the pulley
by 6 turns in such a manner
that the wire can be pulled
from over the pulley.
11.Insert wire B in the up/down shaft,
attach a pulley, and wind wire B
around the pulley by six turns in
such a manner that the wire can
be pulled from over the pulley.
4. Pull wire C from under the
9. pulleys.
3. Insert wire C in the up/down
8. shaft, attach a pulley, and
secure the pulley with E-rings.
1. Insert wire D in the
6. up/down shaft, attach
pulleys, then pull wire
D from under the
pulleys.
16.Insert wire B in the up/
down shaft, attach a
pulley, and wind wire B
around the pulley by six
turns in such a manner
that the wire can be
pulled from over the
pulley.
19.Wind wire A around the
pulley by 6 turns in such
a manner that the wire
can be pulled from over
the pulley.
18.Insert wire A in the up/
down shaft, attach a
pulley, and secure the
pulley with an E-ring.
5. Insert wire C in the
pulleys, then attach a
metal ball.
17.Insert wire B in the
pulleys, then attach a
metal ball.
2. Insert wire D in the
pulleys, then attach a
metal ball.
20.Insert wire A in the
pulleys, then attach a
metal ball.