


216 MFP disassembly/assembly ENWW
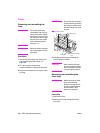
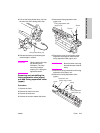
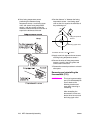
5 Remove two bearings from the fusing
lower roller.
6 Reinstall the above parts following the
removal steps in reverse.
CAUTION The fusing entrance guide
plate (lower) should be
pressed against the fusing
upper roller bearing when
installing.
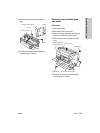
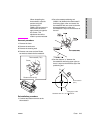
Removing and reinstalling the
decurler roller
Procedure
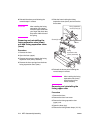
1 Remove the fuser.
2 Open the fuser (top).
3 Lift the fusing exit guide plate (upper) and
remove two screws to remove the fusing
exit guide plate (lower).
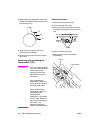
4 Remove the screw to detach the jam
handling release knob.
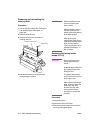
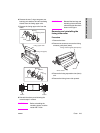
5 From the front side, remove one E-ring,
one gear, one E-ring, one washer, one
screw, and bearing in this order.
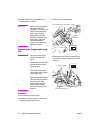
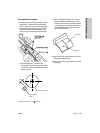
6 From the rear side, remove one E-ring,
one washer, one screw, and bearing in this
order and then remove the decurler roller
from the frame.
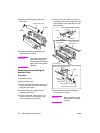
7 Reinstall the above parts following the
removal steps in reverse.
CAUTION When reinstalling, check
that the gear is installed
correctly.
Fixing lower roller
Bearing
Bearing
Washer
Bearing
Decurler roller
Fixing exit guide plate (lower)
Fixing exit guide plate (lower)
Screw
Screw
Screw
Screw
Screw
E-ring
E-ring
Fixing exit guide
plate (lower)
Fixing exit guide
plate (upper)
E-ring
Bearing
Washer
Gear
Jam handling release knob