


164 MFP disassembly/assembly ENWW
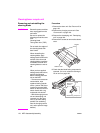
3 Reinstall the above parts following the
removal steps in reverse.
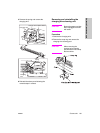
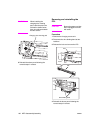
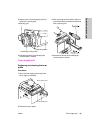
CAUTION When installing the
transfer/separation corona
unit, make sure the
cleaning gear coupling is
engaged properly.
Removing and reinstalling the
plunger prevention plate
CAUTION Be sure the power cord has
been unplugged from the
wall outlet.
Procedure
1 Pull the ADU frame from the MFP. See
“Pulling out and reinstalling the ADU
stand” on page 188.
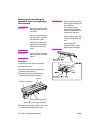
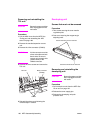
2 Remove the transfer/separation corona
unit.
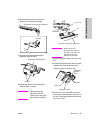
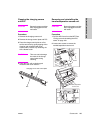
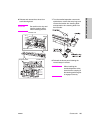
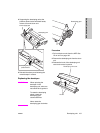
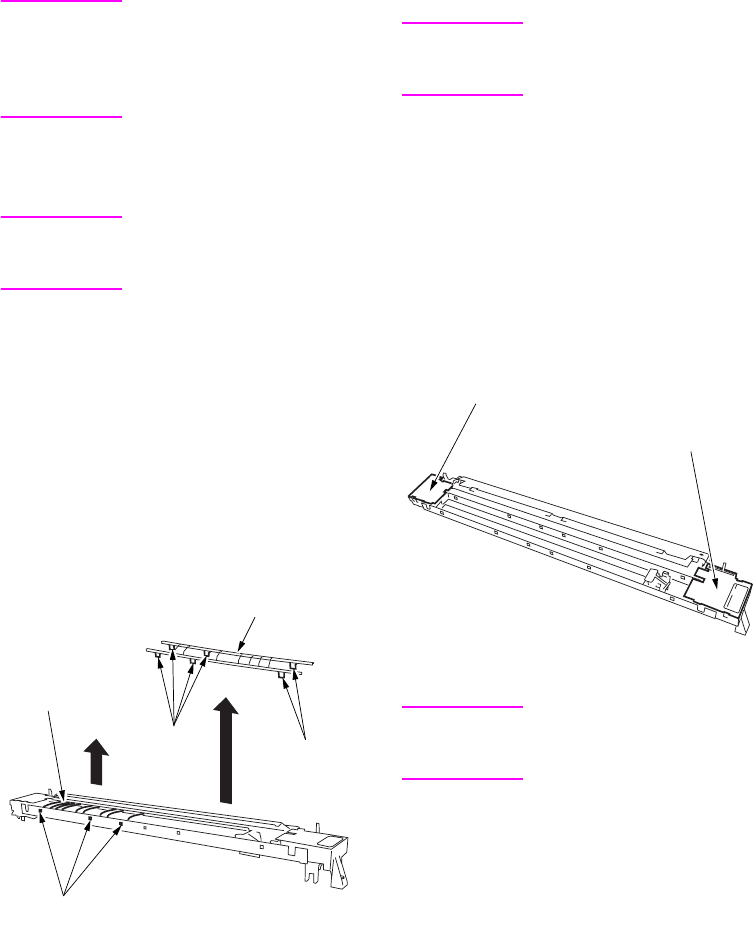
3 Release the six locks and remove the
plunger prevention plate (front).
4 Release the six locks and remove the
plunger prevention plate (rear).
5 Reinstall the above parts following the
removal steps in reverse.
Replacing the transfer/separation
wires and transfer/separation wire
cleaning block
CAUTION Be sure the power cord has
been unplugged from the
wall outlet.
Procedure
1 Pull the ADU frame from the MFP. See
“Pulling out and reinstalling the ADU
stand” on page 188.
2 Remove the transfer/separation corona
unit.
3 Remove the plunger prevention plate.
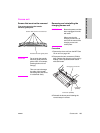
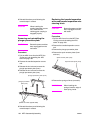
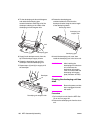
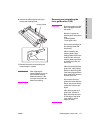
4 Remove the spark arrester plates (front
and rear).
5 Remove the springs of wires (one each).
CAUTION When installing the
springs, bend the edge of
each spring inside.
plunger prevention plate (front)
plunger prevention
plate (rear)
Lock
Lock
Lock
(Same as on the opposite side)
Spark arrester plate (rear)
Spark arrester plate (front)