


Chapter 2 New Features in LabVIEW 5.1
LabVIEW 5.1 Addendum 2-2
©
National Instruments Corporation
• Once an object scales itself automatically, it might not scale back to
its exact original size, when you size the window back to its original
position. However, you can use the Undo command to restore the
original size.
• When scaling arrays, you can set scaling either on the array itself, or
on the objects within the array.
– When you set scaling on the array, you adjust the number of rows
and columns you can see within the array.
– When you set scaling on the objects within the array, you always
see the same number of rows and columns—though different
sizes—within the array.
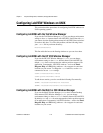
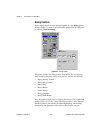
Immediately after you designate an object to scale automatically, several
regions on the front panel appear outlined by dotted lines. When you resize
a window, objects selected to scale automatically reposition themselves in
a manner that is consistent with their previous placement within these
regions. To see these regions—to show the dotted lines on the front
panel—you must meet the following two conditions:
• You have selected one particular object on the front panel to scale
automatically.
• You are operating in Edit mode.
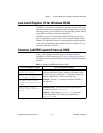
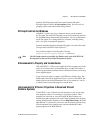
Setting an Object to Scale
You can designate any front panel object to scale automatically to match
changes in the front panel window.
1. Select the front panel object you want to scale.
2. Choose Edit»Scale Object With Window. This option appears with a
checkmark beside it when it has been selected.
Note
If you want to set automatic scaling for all objects on the front panel through the
VI Setup dialog, and you have already set a single object on the front panel to
scale, you must first deselect automatic scaling for the particular object. To do this,
select the front panel object and then choose Edit»Scale Object With Window.
The checkmark disappears when you deselect this option.