Reference Manual for the ProSafe Wireless 802.11g Firewall/Print Server Model FWG114P v2
Print Server 7-3
201-10301-02, May 2005
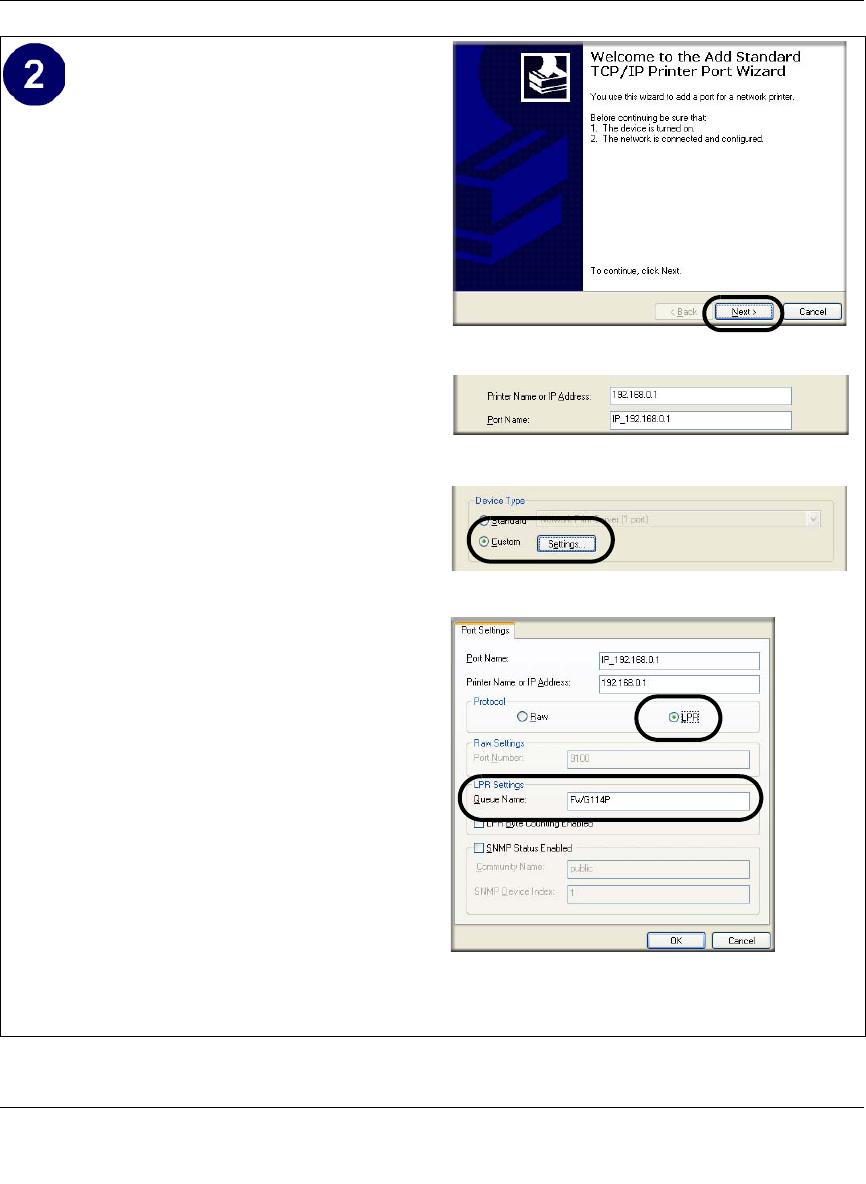
Complete the Add Standard TCP/IP Printer
Port Wizard.
a. Click Next to proceed with the Add
Standard TCP/IP Printer Port Wizard.
The Add Port screen will display.
b. From the Add Port screen, enter
192.168.0.1, the FWG114P v2 default
LAN IP address, in the IP Address field.
Note: If you changed the default LAN IP
Address of the FWG114P v2, be sure to
use the address you assigned here. The
Port Name is automatically filled in.
Click Next to proceed.
c. In the Device Type section of the
Additional Port Information Required
screen, select Custom.
d. In the Custom selection, click Settings.
e. The Port Settings tab page opens. In the
Protocol section, select the LPR radio
button, and enter FWG114P as the
Queue Name in the LPR Settings
section. Click OK to close this tab page.
Click Next to proceed.
The Add Printer Wizard will now
prompt you to install the software for the
printer you attached to the FWG114P v2.
Add Standard TCP/IP Printer Port Wizard
Add Port Screen
Additional Port Information Required
Additional Port Information Required


