Pasting
Once audio data is on the clipboard, you can paste or mix it into an existing data window or use it to create a new data window.
Pasting data in an existing data window
Notes:
• Pasting into a multichannel file will insert data to all channels—the channels in a multichannel file must always be equal in length.
Silence is pasted to the unselected channel. If multiple channels are selected, the same data is pasted to all selected channels, and
silence is pasted to the unselected channel. If no channels are selected, the same data is pasted to all channels.
• Pasting data of different sample rates will cause the data in the clipboard to play at the same rate as the rate of the window in which the
data is pasted.
• If any regions, markers, or loops are present in with the original sound data, they will also be pasted into the destination sound file. To
turn this feature off, turn off the Paste Markers/Regions command on the Options menu.
1.
After you have cut or copied your data, move the cursor to the beginning of the Voiceover.pca file by clicking the Go to Start
button ( ) in the playbar.
• For more information on cutting or copying data, see Copying on page 72 or Cutting on page 74.
• For more information on the playbar, see Playbar on page 34.
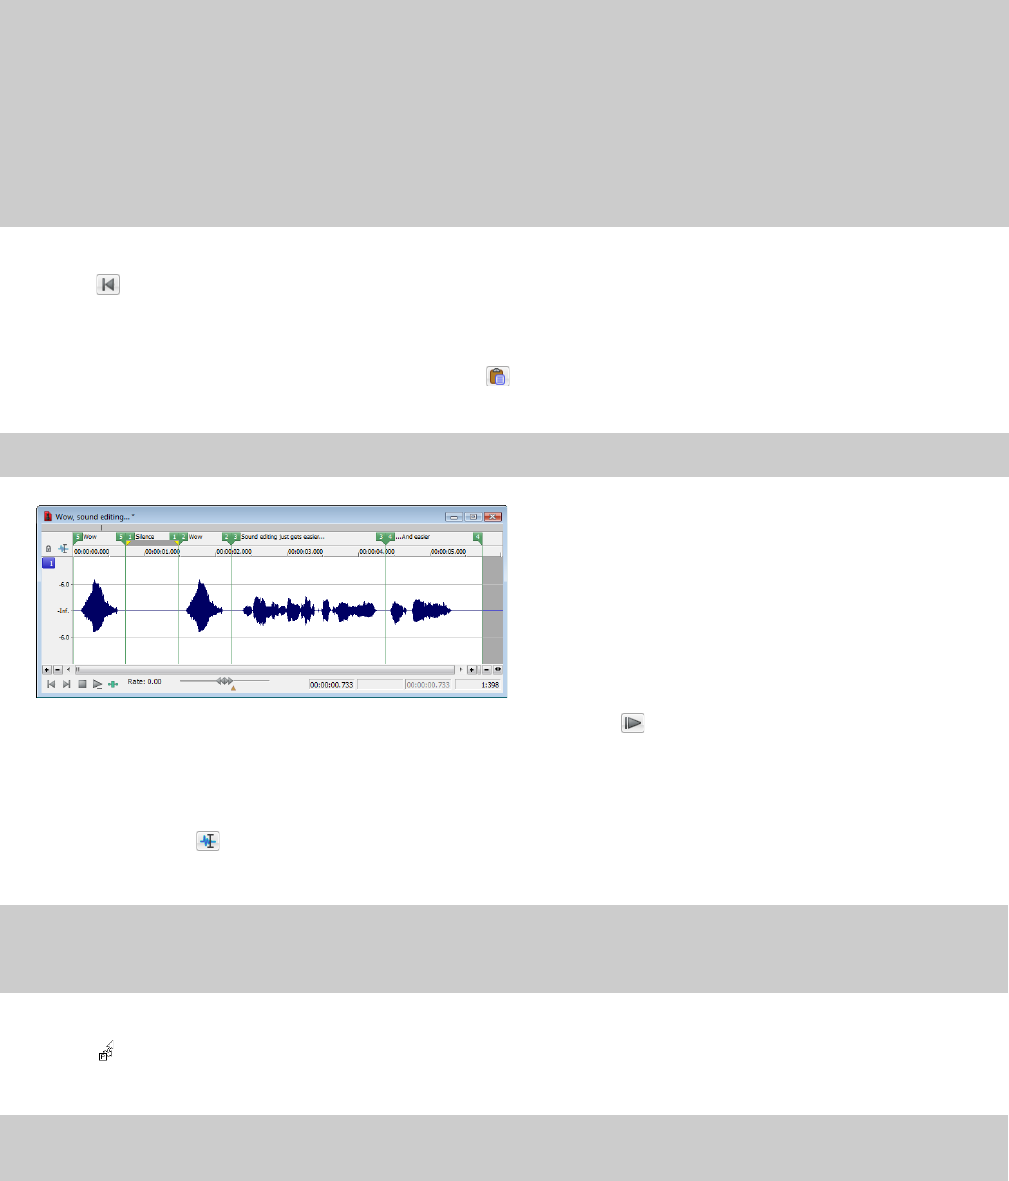
2.
From the Edit menu, choose Paste, or click the Paste button ( ). The clipboard data is inserted into the file and the data for “Wow”
appears on the left side of the waveform.
Note:
If there is a selection, the Paste command deletes the selected data before inserting.
3.
To confirm that the data has been pasted into the file, click the Play All button ( ). “Wow. Wow. Sound editing just gets easier and
easier” plays back.
Pasting by dragging and dropping a selection
1.
Choose the Edit tool (
2.
Drag the mouse in the data window to create a selection anywhere in Voiceover.pca.
).
Tip:
If the Always open dropped files in new window check box on the General tab of the Preferences dialog is cleared, you can
also hold Ctrl while dragging a file (or region) from the Explorer window to a data window to paste sound data. When the check box is
selected, dropping a file on the Sound Forge workspace always creates a new data window.
3.
Hold Ctrl and drag the selection to the location where you want to paste the data. The cursor appears as a mouse pointer with the
letter P (
), and a vertical line appears to show you where the paste will occur.
You can click the right mouse button while dragging to toggle mix, paste, and CD track drag-and-drop modes.
Tip:
When dragging a selection to paste sound data, drag up or down before moving the mouse left or right. Dragging left or right
before moving the mouse vertically adjusts the selection length.
GETTING STARTED | 73


