


Page 2-11INSTALLATION
Connection Tests
The following tests will verify that proper connections have been made
between the ALLY PLUS, the host, the printer(s) and the alternate host(s).
Printer/Plotter Verification
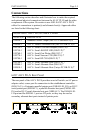
In order to verify the printer connection, send a General Configuration
Report to the printer. Press the MODE button on the front panel of the
ALLY PLUS until the LED reads 5, and the report will print out a few
seconds later. If using a plotter, press the MODE button until the LED reads
9. A sample General Configuration Report and a Plotter Test can be
found in the Appendix.
If the report does not print:
Check that the ALLY PLUS and the printer are connected to a power
source, powered on and on line. The ALLY PLUS front panel LED
should be on.
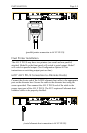
Verify that the printer is securely connected to the ALLY PLUS with
an ALLY PLUS cable or with an ALLY PLUS COM Port Adapter
used with the printers serial cable.
If using a serial printer, be certain to connect to the SERIAL 1 port.
If using a parallel printer, be sure to use the PARALLEL I/O port.
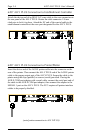
The ALLY PLUS may be configured incorrectly for a serial or
parallel printer (the default is parallel). Select serial output by using
Mode B on the front panel. Select parallel output by using Mode C
on the front panel.
If using a serial printer, make sure that the Option Group #40 settings
(Options 41-45) match the printer interface settings for baud rate,
parity, word length (data bits), stop bits and handshaking. The
default settings are 8 data bits, 1 stop bit, no parity, 9600 baud and
RTS/CTS flow control. Refer to Section 3 Configuration for
detailed instructions on configuration, and change the settings as
needed.
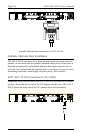
If using a plotter, make sure that the Option #03 is set correctly.
Refer to Section 3 Configuration, and change the settings as
needed.
Confirm that the printer is functioning properly by having it perform
a self test. Refer to the printer users manual for instructions.