11
Basic Operations
Adjusting the Screen Image
You can adjust the screen image in order to obtain the best possible picture.
The size of the projected image is basically determined by the distance from the projector to the screen.
(Refer to the Setup Guide.)
The following procedures explain how to adjust the screen image once the projector itself has been set up.
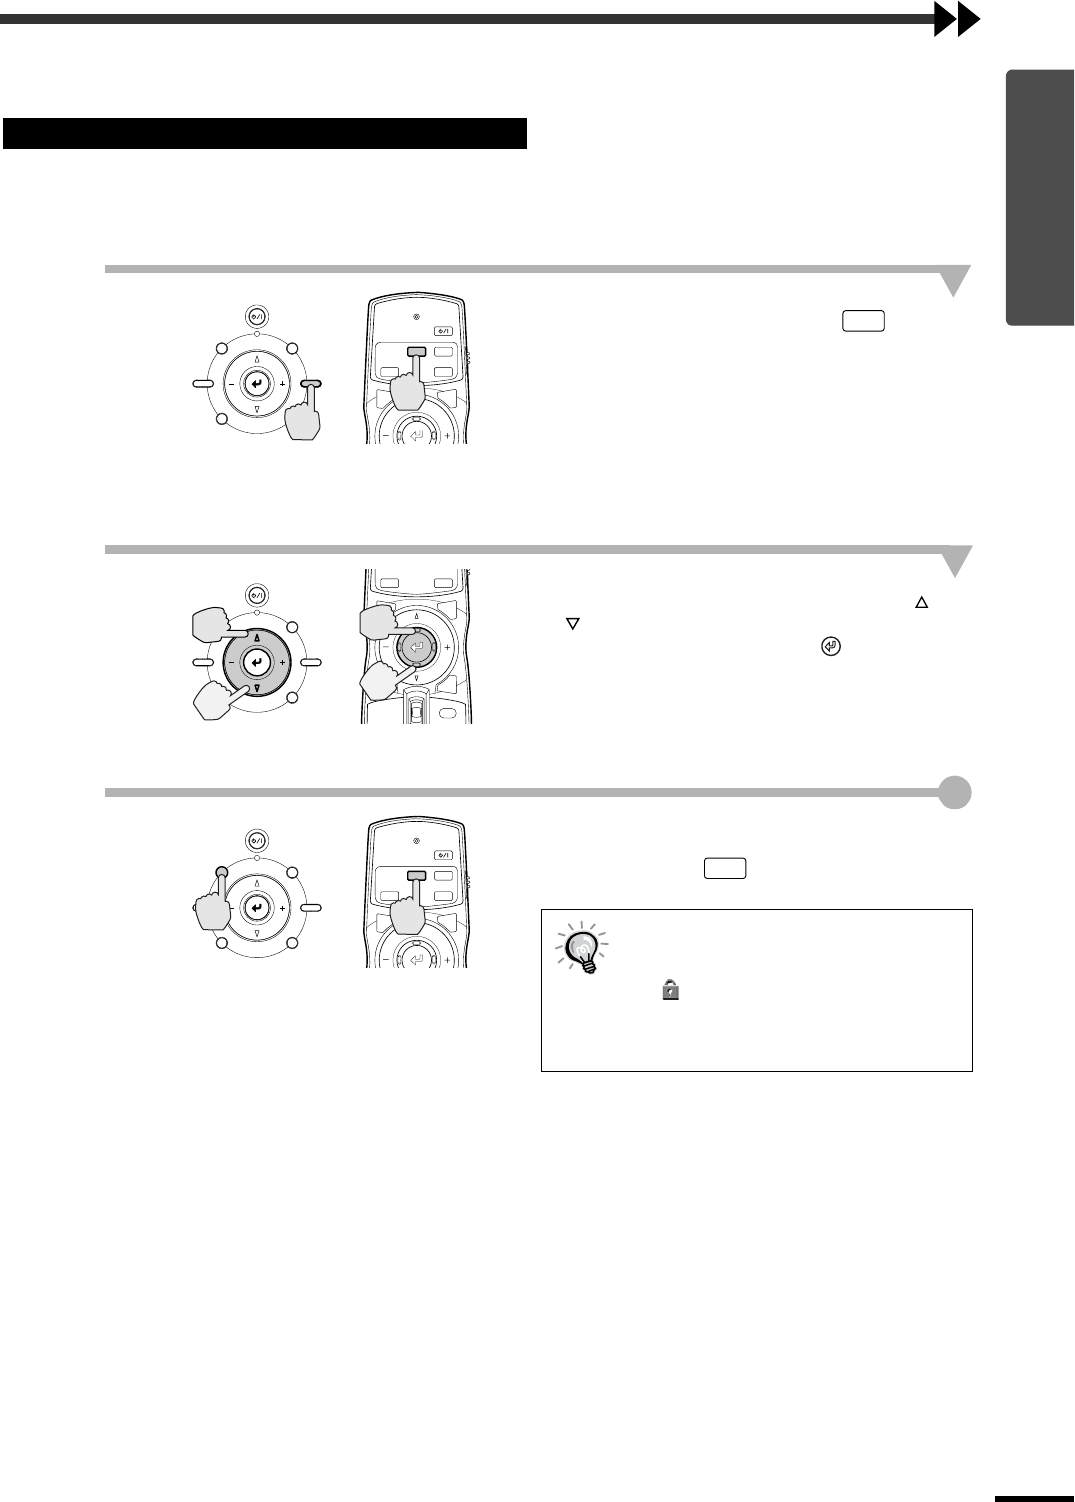
1
Press the [SETTING] button on the
projector's control panel or the
button on the remote control.
An adjustment icon will be displayed over the
image during projection.
The adjustment mode changes as follows each
time the [SETTING] button on the projector's
control panel is pressed.
Zoom →
→→
→ Focus →
→ →
→ Iris
2
Adjust the image size.
If using the projector's control panel, press the
or button to adjust the image size.
If using the remote control, tilt the button to
adjust the image size.
Adjustment is also possible while a test pattern is
being projected. (p.14)
3
Exit adjustment mode.
Press the [ESCAPE] button on the projector's
control panel or the button on the remote
control.
Adjusting the Image Size (Zoom adjustment)
When the electronic zoom lock is set to
"ON", the projection size cannot be
adjusted.
The symbol will be displayed at this
time. To carry out adjustments, change
the electronic zoom lock setting to
"OFF". (p.34)
STANDBY/ON
ESCAPE MENU
ASPECT INPUT
PATTERN SETTING
MENU
PAT TIRIS
SETTING
FOCUS
ESCAPE
ZOOM
Projector Remote control
ZOOM
Projector
Remote control
STANDBY/ON
ESCAPE MENU
ASPECT INPUT
PATTERN SETTING
HIDE
INPUT
MENU
PAT TIRIS
SETTING
ASPECT
ESCAPE
LIGHT
STANDBY/ON
ESCAPE MENU
ASPECT INPUT
PATTERN SETTING
MENU
PAT TIRIS
SETTING
FOCUS
ESCAPE
ZOOM
Projector
Remote control
ZOOM
