


Using the remote control and
remote operating range
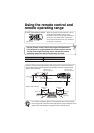
Do not allow sunlight or light from fluorescent lamps to shine directly
onto the projector's remote control light-receiving area, otherwise it may
interfere with the reception of signals from the remote control.
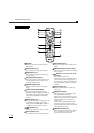
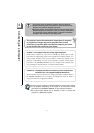
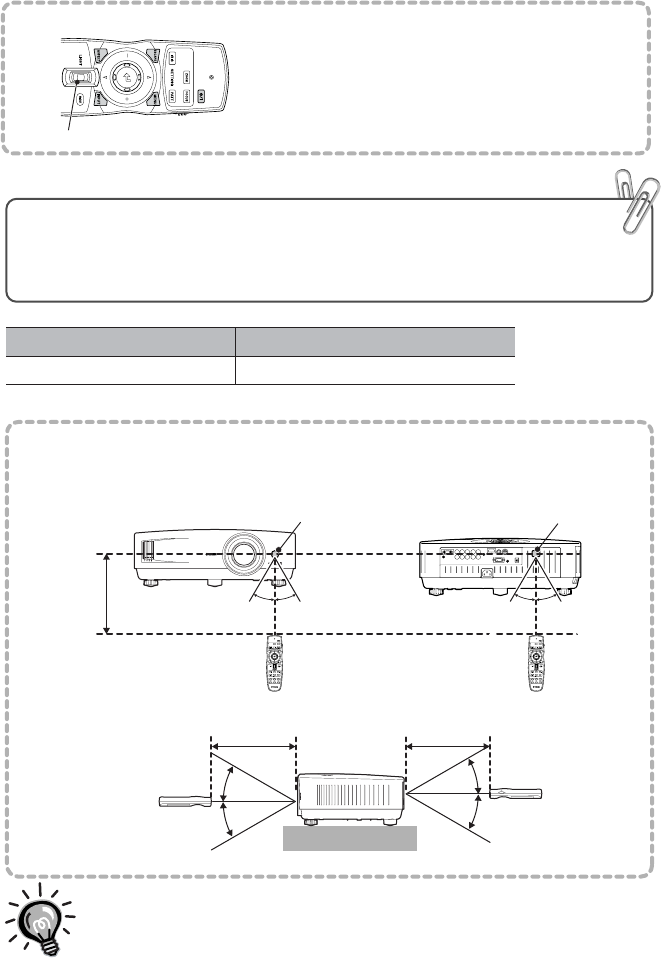
[LIGHT] switch
[LIGHT] (illumination) switch
When the [LIGHT] switch is tilted up or down,
the buttons with indicators shown in the
illustration at left will light for approximately 10
seconds. If the [LIGHT] switch is tilted up or
down while the buttons are lit, they will stay lit
for a further 10 seconds.
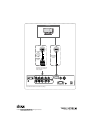
G/Y
B / P
E:
/C
E:
D4 VIDEO
HDMI
VIDEO
RS-232C
S VIDEO
R/ P
R:
/C
R:
HD/SYNCVD
G/Y
B / P
E:
/C
E:
R/ P
R:
/C
R:
HD/SYNCVD
INPUT A
INPUT B
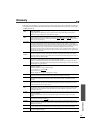
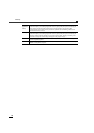
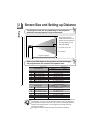
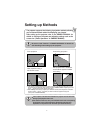
Operating distance
Operating angle
Approx. 7 m (23 ft)
Approx. 30˚ vertically and horizontally
Approx. ±30˚ horizontally
Approx. ±30˚
vertically
Approx. 30˚ Approx. 30˚ Approx. 30˚
Approx. 7 m
(23 ft)
Approx. 30˚
Approx. 30˚
Approx. 30˚
Approx. 7 m
(23 ft)
Approx. 30˚
Approx. 30˚
Approx. 7 m
(23 ft)
2
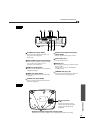
Point the remote control light-emitting area toward one of the remote control
light-receiving area on the projector and operate the remote control buttons.
Remote control
light-receiving area
Remote control
light-receiving area
Use the remote control within the ranges indicated below.
If the distance or angle between the remote control and the
remote control light-receiving area is outside the normal
operating range, the remote control may not work.