


Be sure to read "Caution" in OWNER'S MANUAL for details on
safe handling when setting up the projector.
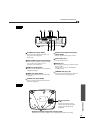
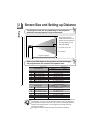
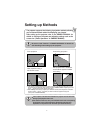
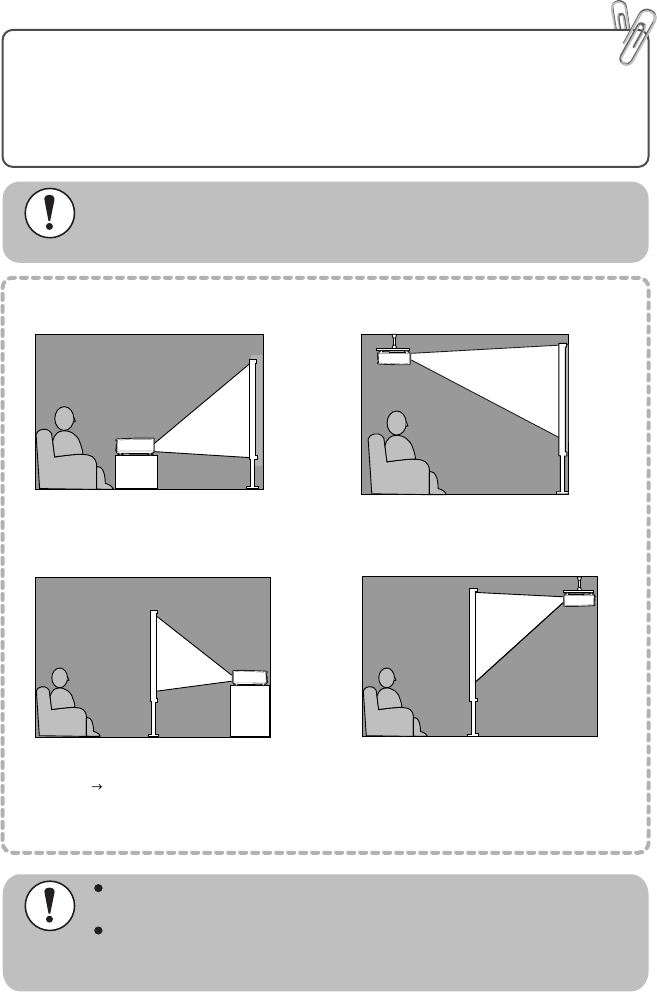
Front projection
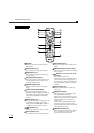
Rear projection using a
translucent screen
Rear projection onto a translucent
screen with the projector installed
to the ceiling
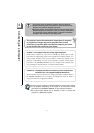
*1 If the projector is projecting from above or below the screen or from the side of the screen, use the
lens shift function to adjust the image projection position. (OWNER'S MANUAL "Adjusting the screen
image" Adjusting the projection position (lens shift) )
*2 When installing to the ceiling or projecting from behind the screen, set the "Projection" command in
the menu ("Setup" - "Screen" - "Projection") to match the method of projection being used.
("Setup" menu in OWNER'S MANUAL)
Front/ceiling projection
Setting-up Methods
The projector supports the following 4 projection methods, allowing
you to choose the best method for displaying your images.
After setting up the projector, refer to the OWNER'S MANUAL for
details on turning on the power and adjusting settings such as the
screen size. ("Basic Operations" in OWNER'S MANUAL)
Leave a space of at least 20 cm between the projector and the wall when
setting up the projector near a wall.
The customer must never carry out installation work such as suspending
the projector from a ceiling themselves. (Specialist techniques and
experience are required for such work. Ask your dealer for advice.)
4