Adjusting the Screen Image
14
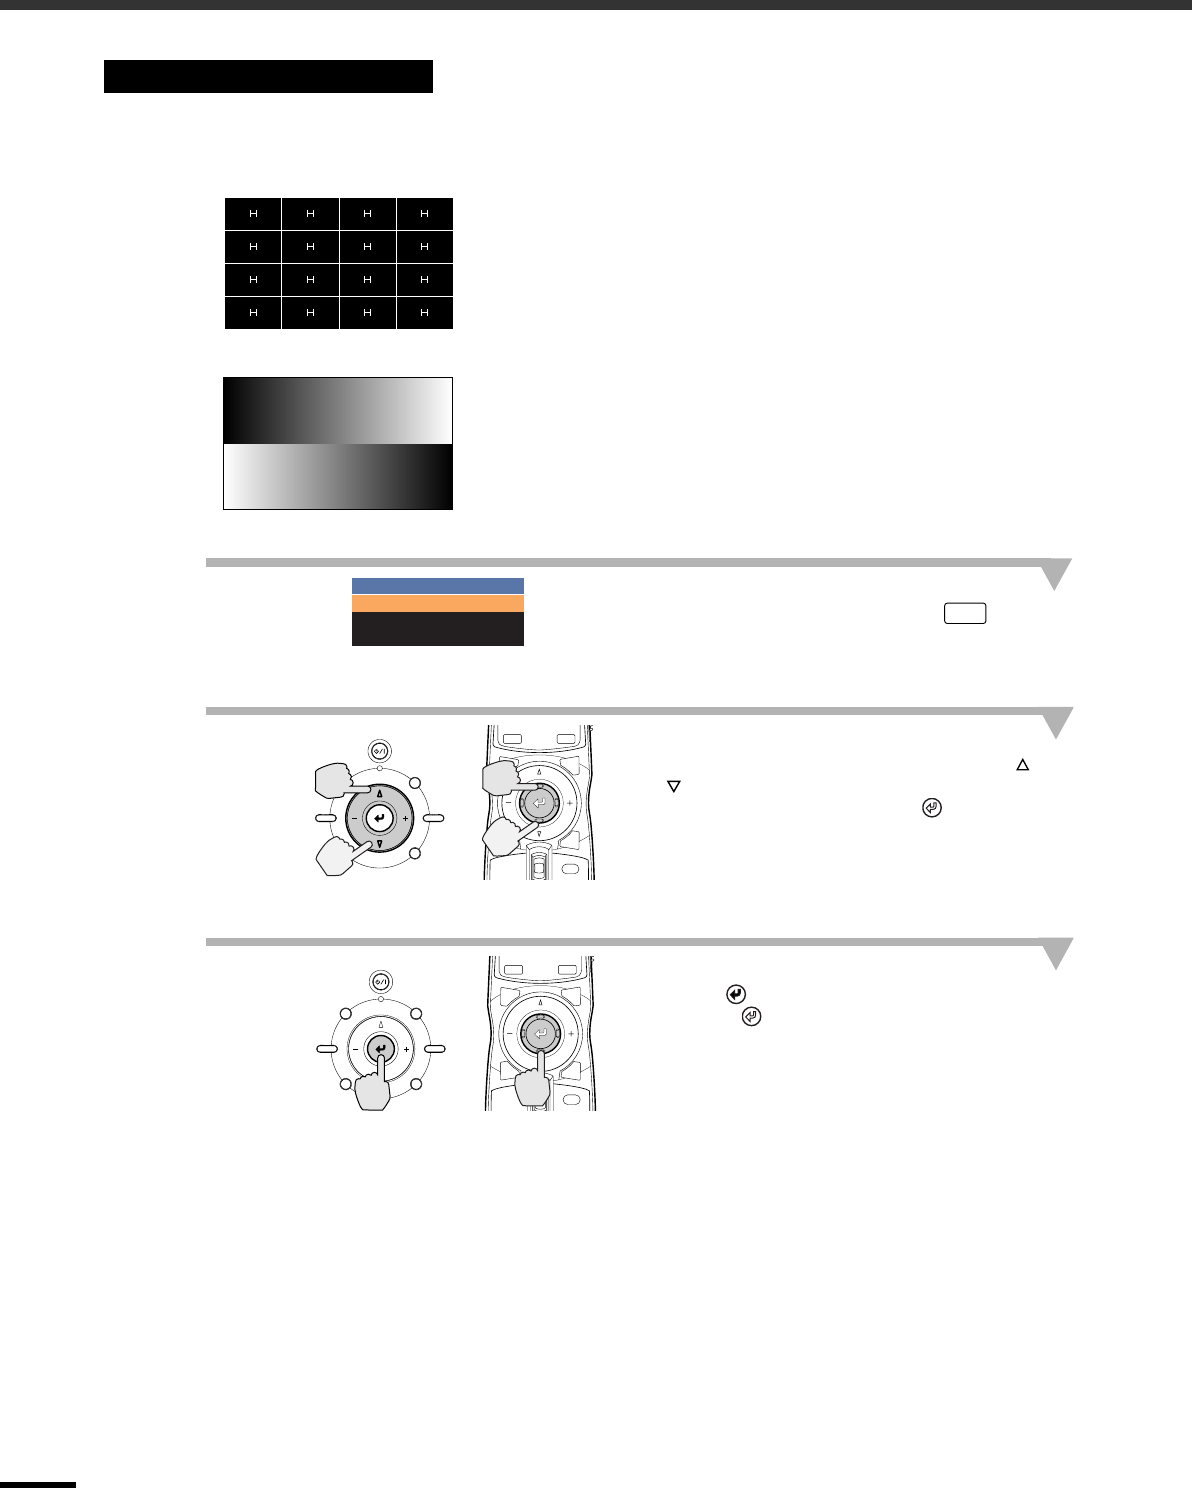
You can project a test pattern at times such as when setting up the projector in order to correct keystone
correction and to make line menu adjustments.
•
••
•
Crosshatch
•
••
•
Grayscale pattern
1
Press the [PATTERN] button on the
projector's control panel or the
button on the remote control.
A pattern select menu will be displayed.
2
Select a pattern.
If using the projector's control panel, press the
or button.
If using the remote control, tilt the button
vertically.
3
Confirm the pattern selection.
Press the
button on the projector's control
panel or the button on the remote control.
Displaying a Test Pattern
This can be used to check whether the projector is tilted or set up
vertically in front of the screen.
This is used when adjusting brightness or when adjusting image quality
or color tone.
The adjustment is made using the line menu. Adjustments other than
brightness are not possible when no image signals are being input.
Test Pattern
Cross-hatching
Gray Scale
Exit
PATT
STANDBY/ON
ESCAPE MENU
ASPECT INPUT
PATTERN SETTING
HIDE
INPUT
MENU
PAT TIRIS
SETTING
ASPECT
ESCAPE
LIGHT
Projector
Remote control
STANDBY/ON
ESCAPE MENU
ASPECT INPUT
PATTERN SETTING
HIDE
INPUT
MENU
PAT TIRIS
SETTING
ASPECT
ESCAPE
LIGHT
Projector
Remote control
