The SmartSwitch 2000 Chassis View
2-76 Managing the Hub
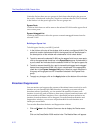
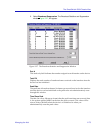
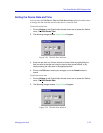
3. Enter the new date in a mm/dd/yyyy format, either by highlighting the field you
wish to change and using the up and down arrow buttons, or by simply
entering the new value in the appropriate field.
4. Click on the OK button to save your changes, or on the Cancel button to
cancel.
Enabling and Disabling Ports
When you disable bridging at a port, you disconnect that portÕs network from the
bridge entirely. The port does not forward any packets, nor does it participate in
Spanning Tree operations. Nodes connected to the network can still communicate
with each other, but they canÕt communicate with the bridge or with other
networks connected to the bridge. When you enable a port, the port moves from
the Disabled state through the Learning and Listening states to the Forwarding
state; bridge port state color codes will change accordingly.
From the Port menus in the SmartSwitch 2000 Chassis View, you can enable and
disable any individual ports:
1. Click on the desired Port index. The Port menu will appear.
2. Select Enable to enable the port, or Disable to disable the port. Your port will
now be enabled or disabled as desired.
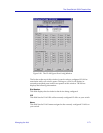
From the Module menu in the SmartSwitch 2000 Chassis View, you can enable or
disable bridging at the device level:
1. Click on the Module Index in the chassis display. The Module menu will
appear.
2. Click on Enable Bridge to restart bridging at the device level, or Disable
Bridge to halt bridging across the entire device.
NOTE
In accordance with Year 2000 compliance requirements, SPECTRUM Element Manager
now displays and allows you to set all dates with four-digit year values.
NOTE
For more information about bridging functions and how to determine the current state of
each bridge port, see the Bridging chapter in the SPECTRUM Element Manager
Tools Guide.


