


26-10
Catalyst 2950 and Catalyst 2955 Switch Software Configuration Guide
OL-10101-02
Chapter 26 Configuring System Message Logging
Configuring System Message Logging
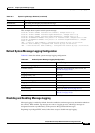
When the history table is full (it contains the maximum number of message entries specified with the
logging history size global configuration command), the oldest message entry is deleted from the table
to allow the new message entry to be stored.
To return the logging of syslog messages to the default level, use the no logging history global
configuration command. To return the number of messages in the history table to the default value, use
the no logging history size global configuration command.
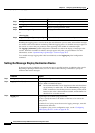
Configuring UNIX Syslog Servers
The next sections describe how to configure the UNIX server syslog daemon and how to define the UNIX
system logging facility.
Logging Messages to a UNIX Syslog Daemon
Before you can send system log messages to a UNIX syslog server, you must configure the syslog
daemon on a UNIX server. Log in as root, and perform these steps:
Note Some recent versions of UNIX syslog daemons no longer accept by default syslog packets from the
network. If this is the case with your system, use the UNIX man syslogd command to determine what
options must be added to or removed from the syslog command line to enable logging of remote syslog
messages.
Step 1 Add a line such as the following to the file /etc/syslog.conf:
local7.debug /usr/adm/logs/cisco.log
The local7 keyword specifies the logging facility to be used; see Table 26-4 on page 26-11 for
information on the facilities. The debug keyword specifies the syslog level; see Table 26-3 on page 26-8
for information on the severity levels. The syslog daemon sends messages at this level or at a more severe
level to the file specified in the next field. The file must already exist, and the syslog daemon must have
permission to write to it.
Step 2 Create the log file by entering these commands at the UNIX shell prompt:
$ touch /var/log/cisco.log
$ chmod 666 /var/log/cisco.log
Step 3 Make sure the syslog daemon reads the new changes:
$ kill -HUP `cat /etc/syslog.pid`
For more information, see the man syslog.conf and man syslogd commands on your UNIX system.
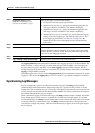
Step 5
show running-config Verify your entries.
Step 6
copy running-config startup-config (Optional) Save your entries in the configuration file.
1. Table 26-3 lists the level keywords and severity level. For SNMP usage, the severity level values increase by 1. For example, emergencies
equal 1, not 0, and critical equals 3, not 2.
Command Purpose