


29-29
Catalyst 2950 and Catalyst 2955 Switch Software Configuration Guide
OL-10101-02
Chapter 29 Configuring QoS
Configuring Standard QoS
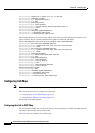
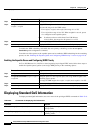
To delete an existing class map, use the no class-map class-map-name global configuration command.
To remove a match criterion, use the no match {access-group acl-index | name acl-name | ip dscp}
class-map configuration command.
This example shows how to configure the class map called class1. The class1 has one match criterion,
which is an ACL called 103.
Switch(config)# access-list 103 permit any any tcp eq 80
Switch(config)# class-map class1
Switch(config-cmap)# match access-group 103
Switch(config-cmap)# end
Switch#
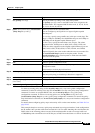
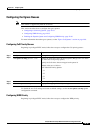
Classifying, Policing, and Marking Traffic by Using Policy Maps
A policy map specifies which traffic class to act on. Actions can include setting a specific DSCP value
in the traffic class and specifying the traffic bandwidth limitations for each matched traffic class (policer)
and the action to take when the traffic is out of profile (marking or dropping).
A policy map also has these characteristics:
• A policy map can contain multiple class statements, each with different match criteria and policers.
• A separate policy-map class can exist for each type of traffic received through an interface.
You can attach only one policy map per interface in the input direction.
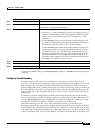
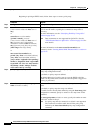
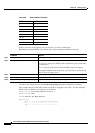
Step 4
match {access-group acl-index |
access-group name acl-name | ip dscp
dscp-list}
Define the match criterion to classify traffic.
By default, no match criterion is supported.
Only one match criterion per class map is supported, and only one ACL
per class map is supported.
For access-group acl-index or access-group name acl-name, specify
the number or name of the ACL created in Step 3.
For ip dscp dscp-list, enter a list of up to eight IP DSCP values for each
match statement to match against incoming packets. Separate each
value with a space. The supported DSCP values are 0, 8, 10, 16, 18, 24,
26, 32, 34, 40, 46, 48, and 56.
Step 5
end Return to privileged EXEC mode.
Step 6
show class-map [class-map-name] Verify your entries.
Step 7
copy running-config startup-config (Optional) Save your entries in the configuration file.
Command Purpose