


15-13
Cisco BPX 8600 Series Installation and Configuration
Release 9.3.10, Part Number 78-11603-01 Rev. D0, July 2001
Chapter 15 Connecting Temporary Terminal and Attaching Peripherals
Connecting Dial-In and Dial-Out Modems
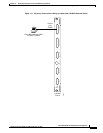
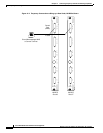
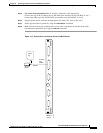
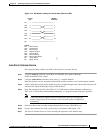
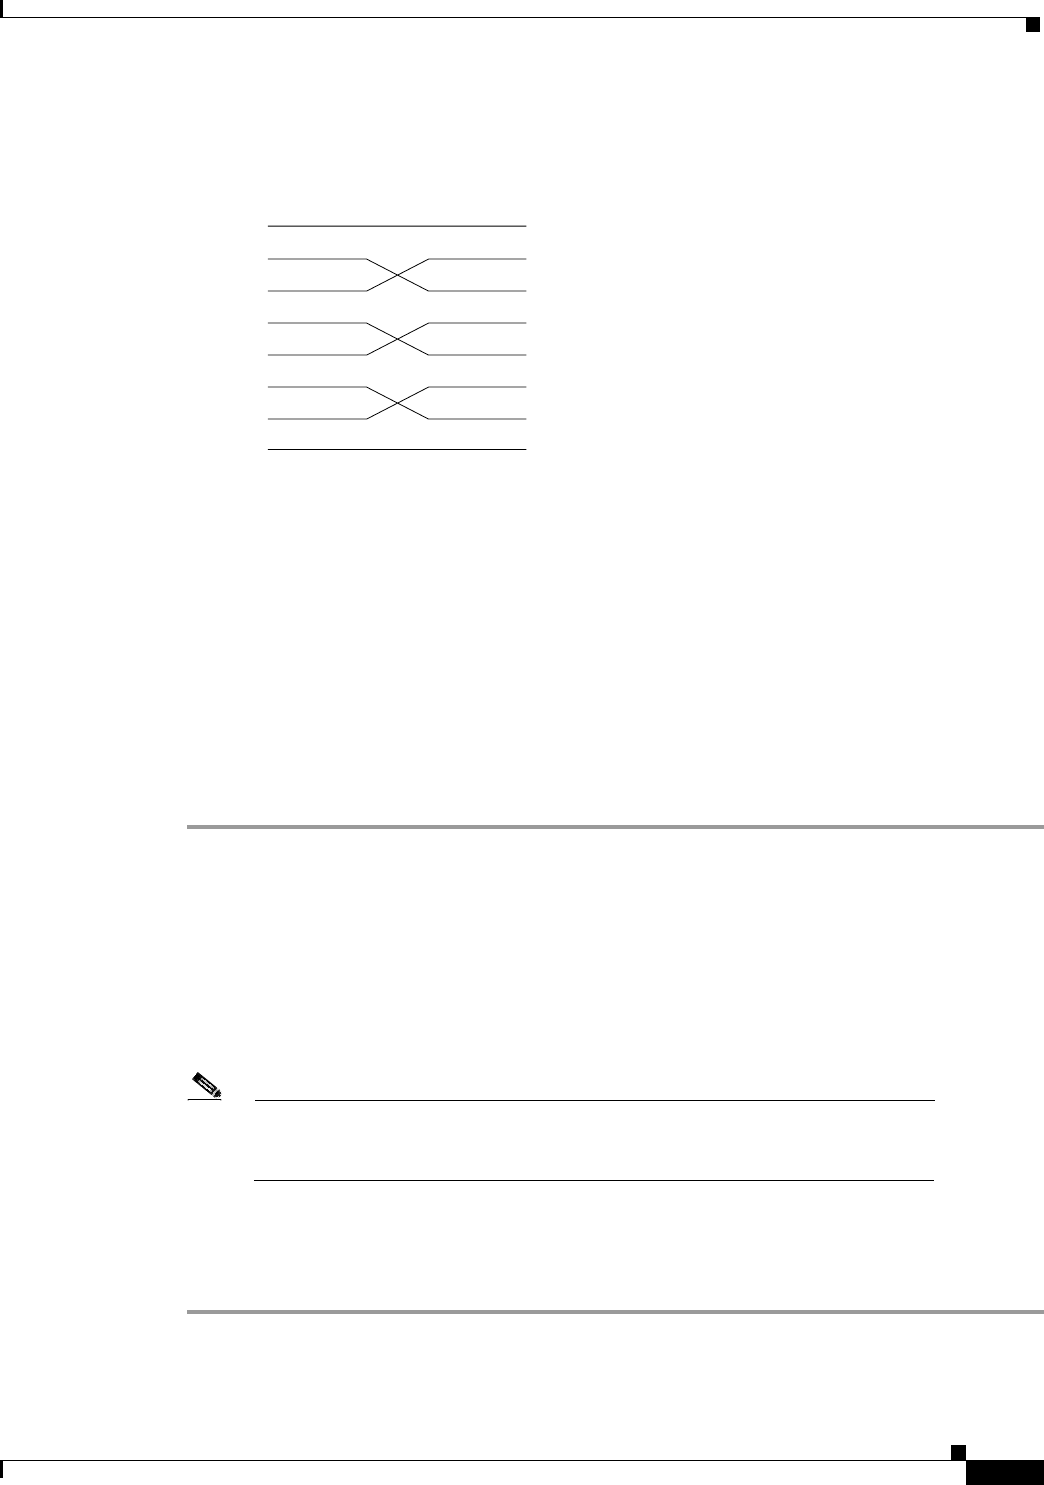
Figure 15-5 Dial-Modem Cabling for Auto Answer (Dial-In to BPX)
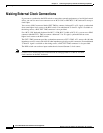
Auto-Dial to Customer Service
This setup procedure enables your BPX to dial up Cisco Customer Service.
Step 1 Using the cnfterm command, set the BPX AUXILIARY port speed to 9600 bps.
Enable XON/XOFF flow control.
Step 2 Using the cnftermfunc command, select option 7, “Autodial Modem”
Enter the customer service-designated Network ID and the customer service modem phone number.
Step 3 Attach a 9600 bps terminal to the modem by using a straight-through cable. The modem EIA port will
automatically match the 9600 bps setting of the terminal.
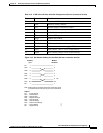
Step 4 Enter the commands listed in either Table 15-8 (V.34R modem without talk/data pushbutton) or
Table 15-9 (V.34R modem with talk/data pushbutton), to set up the modem for proper operation.
Note Consult the manual supplied with your modem for specifics concerning the
modem configuration. Call customer service for latest modem configuration
information.
Step 5 Disconnect the terminal and the straight-through cable from the CONTROL port.
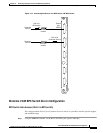
Step 6 Connect the modem to the AUX port by using a null modem cable Figure 15-6.
Step 7 Ask Cisco Customer Service to assist in testing the operation of the modem setup.
Control
port
Modem
connector
1
2
3
4
5
6
20
7
1
2
3
4
5
6
20
7
FG
TXD
RXD
RTS
CTS
DSR
DTR
SG
Legend
FG - Frame Ground
TXD - Transmit Data
RXD - Receive Data
RTS - Request To Send
CTS - Clear To Send
DSR - Data Set Ready
DTR - Data Terminal Ready
CD - Carrier Detect
SG - Signal Ground
12138