


2-16
Cisco uBR7200 Series Universal Broadband Router Software Configuration Guide
OL-2239-03
Chapter2 Configuring the Cable Modem Termination System for the First Time
Configuring the Cisco uBR7200 Series Using AutoInstall
The preceding example shows a minimal configuration for connecting from a router one hop away. From
this configuration, use the setup facility to configure the rest of the interfaces. If the router is more than
one hop away, you also must include routing information in the minimal configuration.
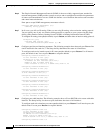
The following minimal network configuration file maps the new router's IP address, 131.108.10.2, to the
host name newrouter. The new router's address was learned via SLARP and is based on the existing
router's IP address of 131.108.10.1.
ip host newrouter 131.108.10.2
Setting Up the BOOTP or RARP Server for Autoinstall
If the new router is connected to the existing router using an Ethernet, Token Ring, or FDDI interface,
you must configure a BOOTP or RARP server to map the new router's MAC address to its IP address. If
the new router is connected to the existing router using a serial line with HDLC encapsulation, or if you
are configuring AutoInstall over Frame Relay, the tasks in this section are not required.
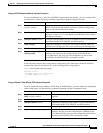
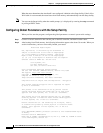
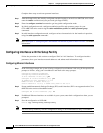
To configure a BOOTP or RARP server, use one of the following commands:
Note If the RARP server is not on the same subnet as the new router, use the ip rarp-server command to
configure the existing router to act as a RARP server. For more information, see the "Configuring a
Router as a RARP Server" section.
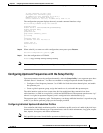
The following host configuration file contains the minimum set of commands needed for AutoInstall
using RARP. It includes the IP address that will be obtained dynamically via BOOTP or RARP during
the AutoInstall process. When RARP is used, this extra information is needed to specify the proper
netmask for the interface.
interface ethernet 0
ip address 131.108.10.2 255.255.255.0
enable-password letmein
!
line vty 0
password letmein
!
end
Connecting the New Router to the Network
Connect the new router to the network using either an HDLC-encapsulated or Frame Relay-encapsulated
serial interface or an Ethernet, Token Ring, or FDDI interface. After the router successfully resolves its
host name, newrouter sends a TFTP broadcast requesting the file name-confg or name.cfg. The router
name must be in all lowercase, even if the true host name is not. The file is downloaded to the new router,
where the configuration commands take effect immediately. If the configuration file is complete, the new
router should be fully operational.
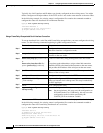
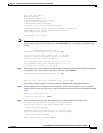
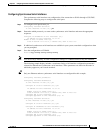
To save the complete configuration to NVRAM, use the following commands in privileged EXEC mode:
Command Purpose
Refer to your host vendor's documentation
and to RFCs 951 and 1395
If BOOTP is to be used to resolve the new router's IP
address, configure your BOOTP server.
Refer to your host vendor's documentation
and to RFC 903
If RARP is to be used to resolve the new router's IP
address, configure your RARP server.
Command Purpose
Step1
enable password Enters privileged mode on the new router.
Step2
copy running-config
startup-config
Saves the information from the name-config file into your startup
configuration. On most platforms, this step saves the configuration to
NVRAM. On the Cisco 7000 family, this step saves the configuration to the
location specified by the CONFIG_FILE environment variable.