Checking Inside the Computer 7-11
Replacing a Cooling Fan
Follow these steps to replace a defective cooling fan.
1. Remove the left computer cover.
See “Removing the Computer Covers” earlier in this
chapter.
2. Identify the defective cooling fan.
3. Disconnect the cooling fan’s power cable from the
applicable FAN connector on the system board.
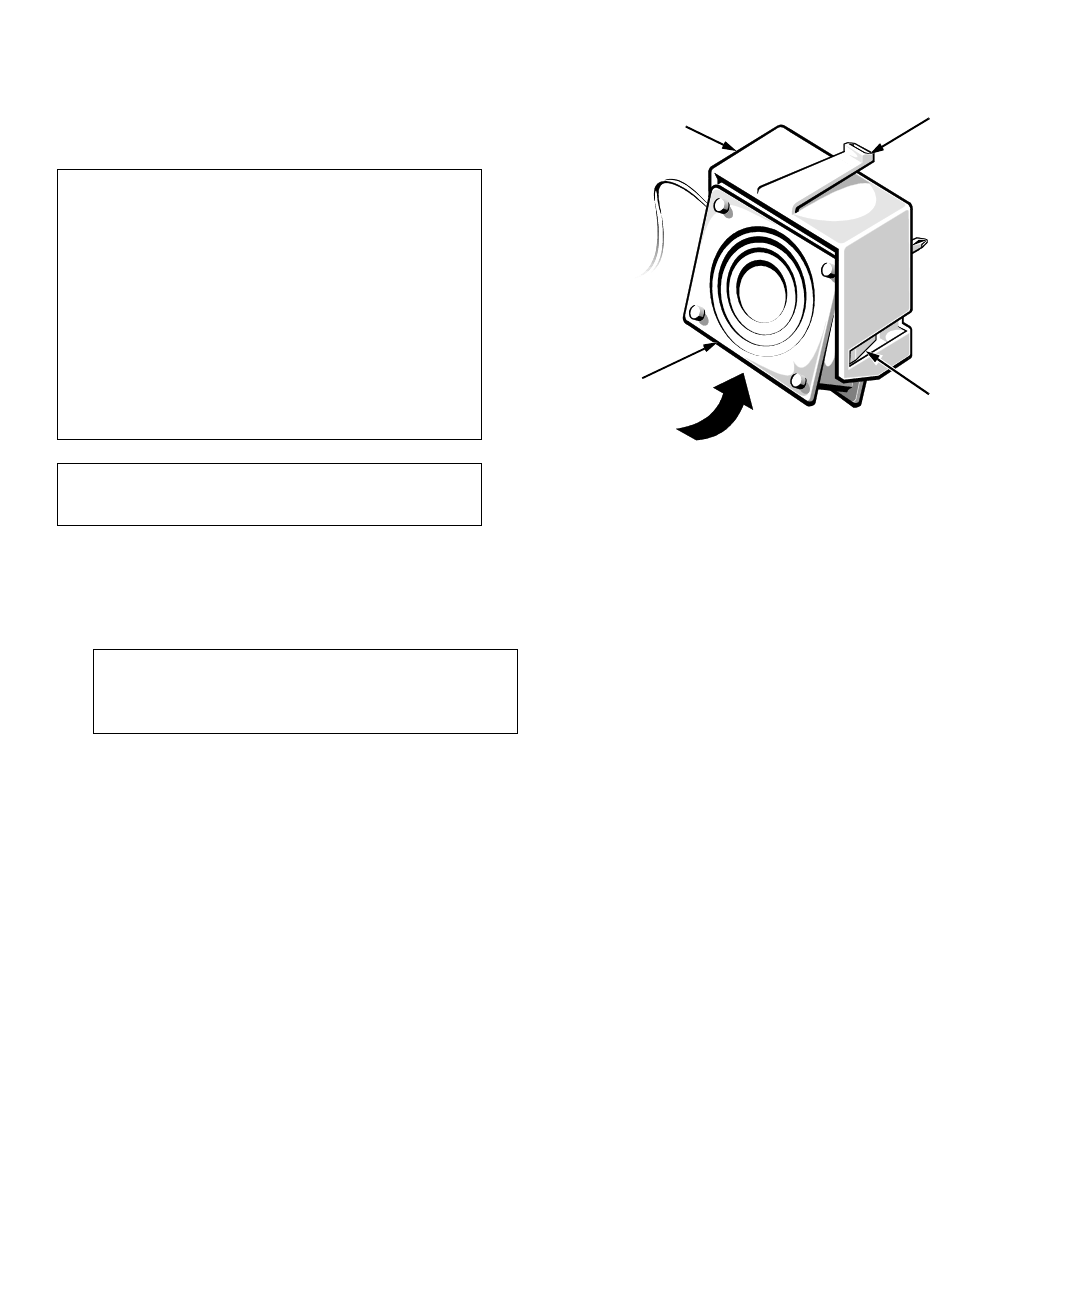
4. Depress the catch on the fan carrier (see Fig-
ure 7-9) and remove the fan carrier from the
chassis.
Figure 7-9. Replacing a Cooling Fan
5. Remove the cooling fan from the fan carrier by
releasing the two fan retention tabs inside the car-
rier (see Figure 7-9).
6. Insert the replacement cooling fan in the carrier,
and snap the two fan retention tabs back into
position.
Orient the fan so that the power cable is at the upper-
right corner of the carrier.
7. Reinstall the fan carrier in the computer.
Insert the two tabs along the lower edge of the fan
carrier into the lances in the chassis; then raise the
fan carrier into position until the catch on the fan car-
rier snaps into place in the computer chassis.
8. Connect the cooling-fan power cable to the
appropriate FAN connector on the system board.
The fan should begin running.
9. Replace the left computer cover.
WARNING: Only trained service technicians
should perform this procedure. Do not remove
the left computer cover with the power on
unless you are replacing a cooling fan. (Never
remove the right computer cover with the com-
puter power on. There are high voltages in this
area that can cause bodily harm.)
Do not touch or attempt to service any compo-
nents other than the cooling fan. Other
components could be damaged if you attempt
to service them with the computer power on.
CAUTION: To ensure correct installation and
safety, use cooling fans supplied by Dell.
CAUTION: See “Protecting Against Electro-
static Discharge” in the safety instructions at
the front of this guide.
retention
tabs (2)
fan carrier
catch
fan


