


Maintaining Your EPSON Stylus Scan
117
Aligning the Print Head
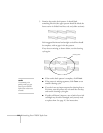
If your printouts contain vertical bands or crooked vertical
lines, you may need to use the Print Head Alignment utility.
Your EPSON Stylus Scan must be connected directly to a local
port, not over a network, to use this utility.
1. Make sure the printer is turned on and has paper.
2. Do one of the following:
W
■
Click
Start
, point to
Settings
, then select
Printers
.
Right-click the
EPSON Stylus Scan 2000
icon and
select
Properties.
Click the
Utility
tab.
M
■
Open the File menu and choose
Page Setup
or
Print.
Then click the
Utility
button.
3. Click the
Print Head Alignment
icon on the Utility
menu.
4. Follow the instructions on the screen to print a test page
and select the correct alignment.
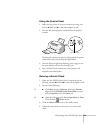
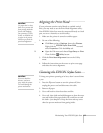
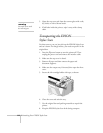
Cleaning the EPSON Stylus Scan
To keep your printer operating at its best, clean it several times
a year.
1. Press the
P
power button to turn the printer off, then
unplug the power cord and disconnect the cable.
2. Remove all paper.
3. Use a soft brush to clean loose dust and dirt.
4. Use a soft, clean cloth and mild detergent to clean the outer
case and inside of the paper feeder. Be careful not to soak
the cloth—just dampen it. Keep the front and top covers
closed to prevent moisture from getting inside.
caution
Use paper that’s at least
letter size to prevent ink
from spraying inside the
printer and smudging
your printouts. For best
results, use EPSON ink
jet paper in the printer
whenever you check the
print head alignment.
caution
Never use alcohol or
thinners, and never
spray inside the printer.
You could damage the
printer mechanisms.