


Settings for NetWare
4-24
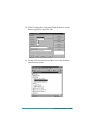
10. To assign the print queue, double-click the Printer object icon
(created in step 9). The Printer dialog box appears.
11. Click
Assignments
and then click
Add
. From the print queue
list, select the queue (created in step 3) and click
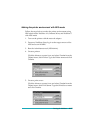
OK
.
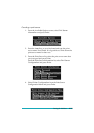
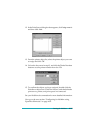
12. Click
Configuration
in the Printer dialog box, and select
Parallel
from the Printer type pull-down menu.
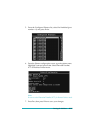
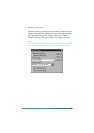
13. Click
Communication
. The Parallel Communication dialog
box appears.
14. Select
LPT1
for Port; check
Polled
for Interrupts; and check
Manual load (Remote from Print Server)
for Connection
type, then click
OK
.
15. Click
OK
in the Printer dialog box.
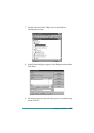
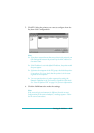
16. To assign the printer, double-click the Print Server object icon
(created in step 5). The Print Server dialog box appears.
17. Click
Assignments
and then click
Add
. From the printer
object list, select the printer object (created in step 9) and click
OK
.
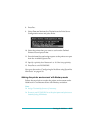
18. In the Print Server dialog box, select the assigned printer from
the printer object list, and click the
Printer Number
button to
set the printer number from 0 to 15, then click
OK
.
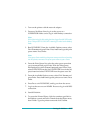
19. To confirm the objects you have assigned, double-click the
Print Server object icon. Click
Print Layout
, and check that the
print server, printer, and print queue are connected.
Now go to the section “Configuring for NetWare using EpsonNet
WinAssist” on page 4-30.