


EPSON Stylus Scan 2500 Revision A
Troubleshooting Unit Level Troubleshooting 61
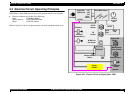
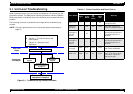
3.1 Unit Level Troubleshooting
When a problem occurs, you can identify the defective unit according to the
symptoms exhibits. The table below lists the symptoms of certain problems.
Once the problem is identified, refer to the flowchart that corresponds to the
problem.
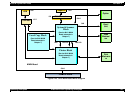
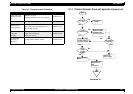
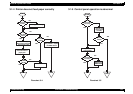
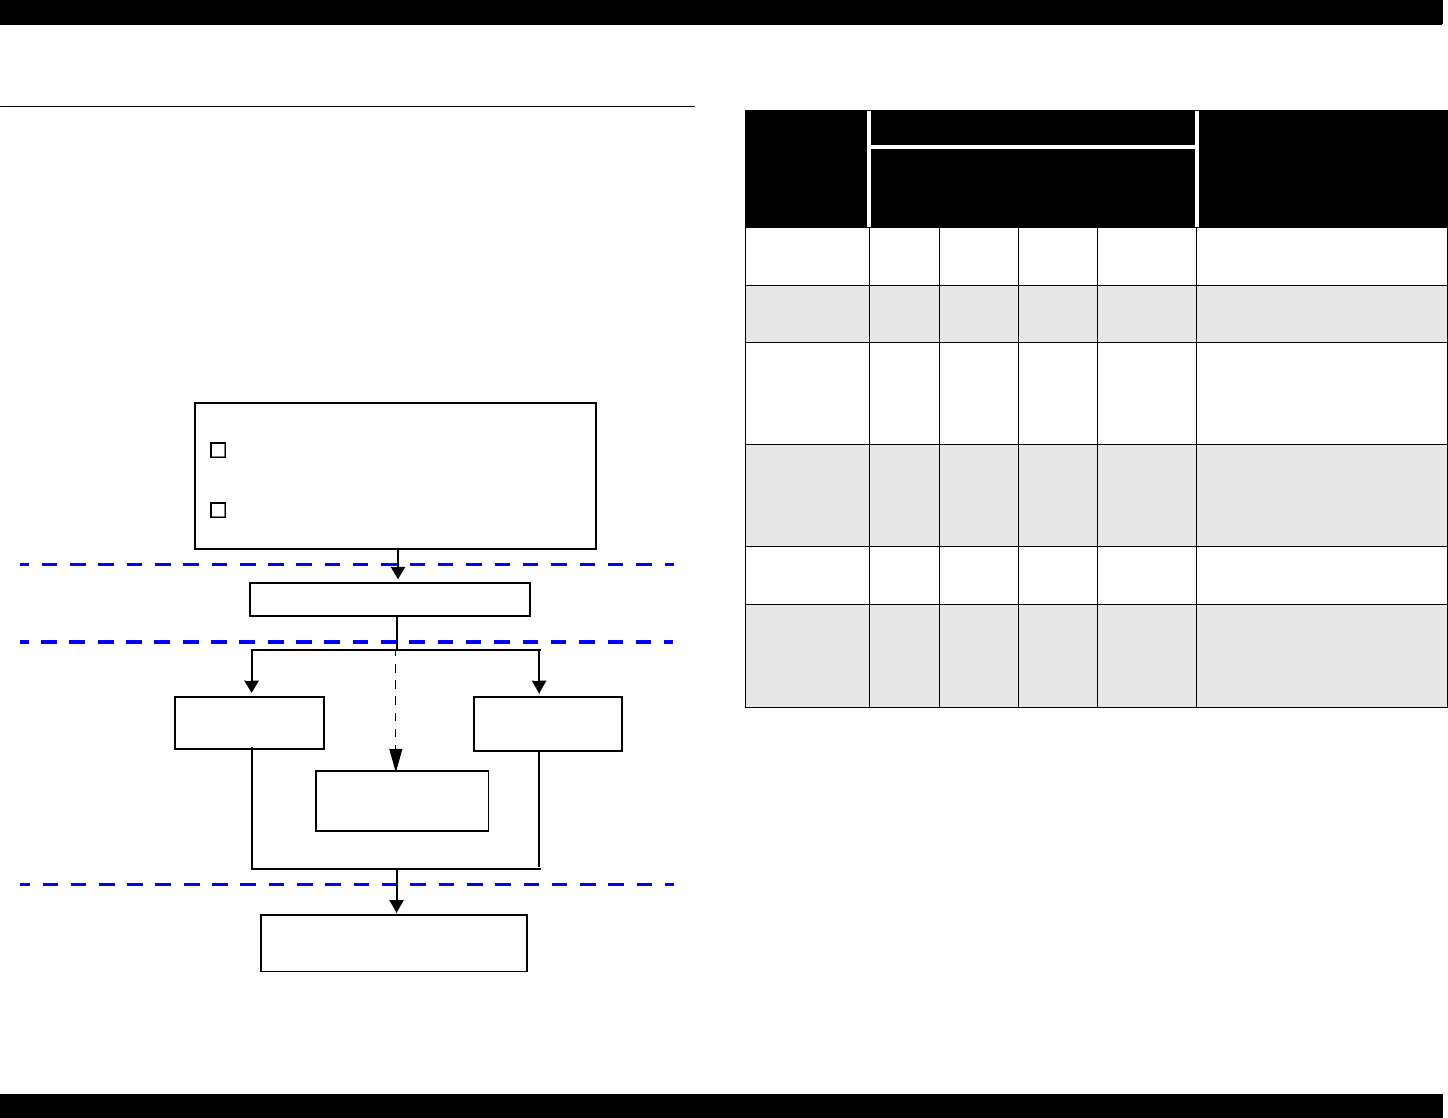
The following flowchart illustrates the main steps of the troubleshooting
process.
NOTE: There is a special section for motors and sensors that starts on
page 73.
Figure 3-1. Troubleshooting Process Flowchart
Diagnose problem
Table 3-1, “Printer Condition and
Panel Status”
Table 3-2, “Symptoms and
Problems”
Printer Mechanism,
page 65
Scanner
Mechanism,
page 69
Reassembly = Chapter 4
Adjustment = Chapter 5
Service the:
Or go directly to
Motors and Sensors
on page 73
Unit Level
Repair
Component
Level Repair
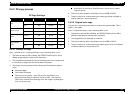
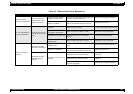
Table 3-1. Printer Condition and Panel Stat us
Error Status
Indicators
Recovery
Powe
r
Ink out
(Black)
Ink
Out
(Color)
Paper
Out
Paper Out --- --- --- On
Load paper by pressing the
load/eject button.
Paper jam
condition
--- Off Off Flash
Eliminate a paper then
press the load/eject button.
No Ink
cartridge or
Ink end
(black)
--- On --- ---
Install a new black ink
cartridge by pressing the
load/eject button for 3
seconds.
No Ink
cartridge or
Ink end
(color)
--- --- On ---
Install a new color ink
cartridge by pressing the
load/eject button for 3
seconds.
Maintenanc
e request
Flash Flash Flash Flash
Change the waste ink pads
and reset the EEPROM.
Fatal error Flash On On Flash
Turn the printer off and on
again. If the printer does
not recover, repair the
appropriate part.