Actions (for Mac OS users)
277
Using the Quick Menu
1. Load the document in the ScanSnap.
For details about how to load documents, refer to "How to Load Documents" (page 30).
2. Press the [Scan/Stop] button on the ScanSnap to start scanning.
3. Press the [Scan/Stop] button on the ScanSnap to finish scanning.
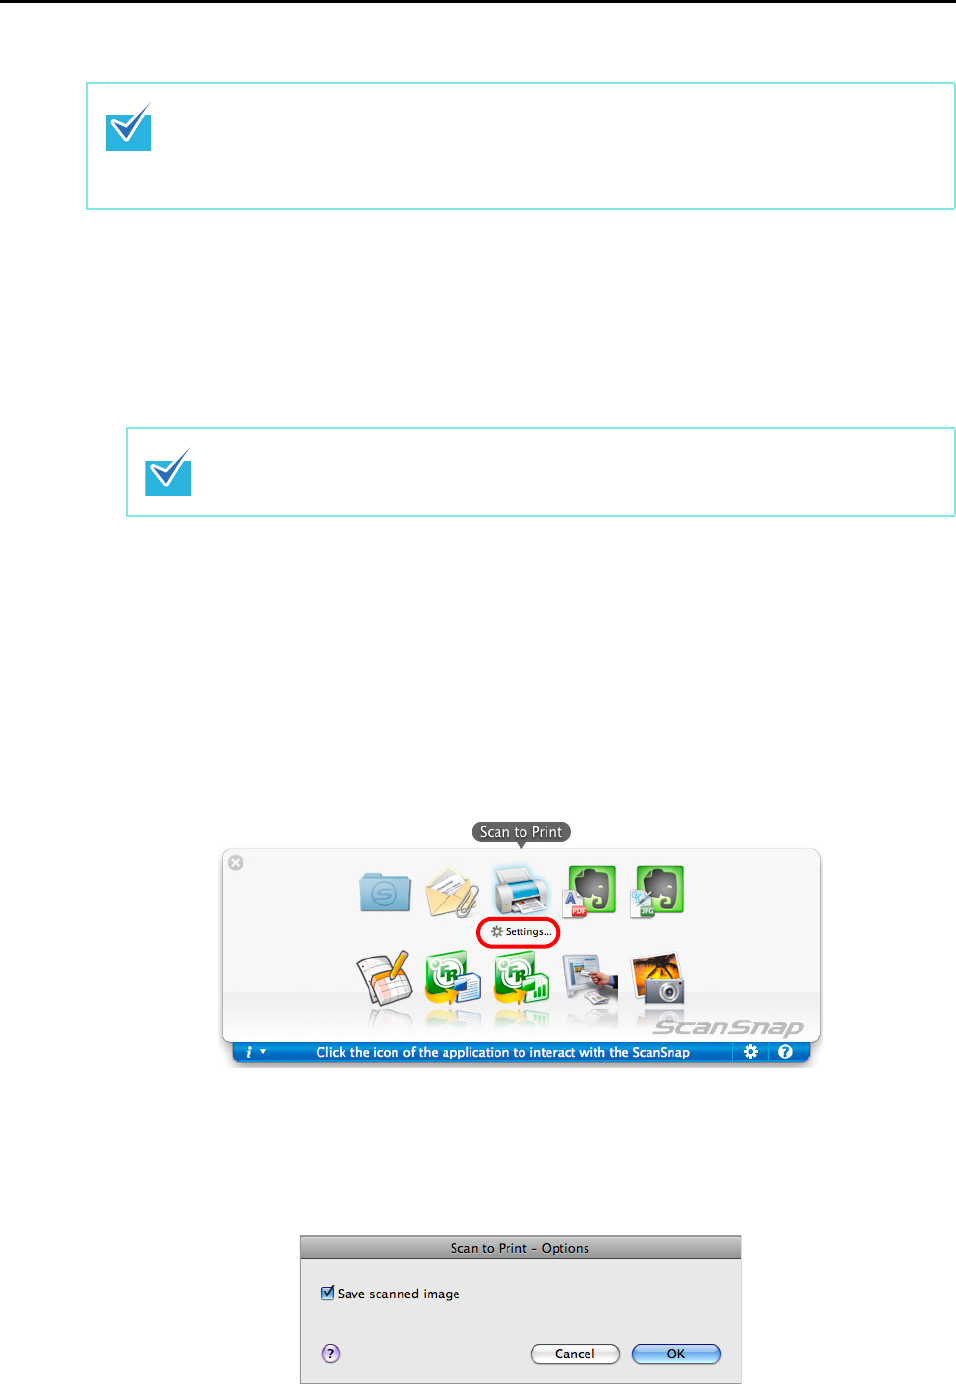
The Quick Menu appears.
4. Change settings for the [Scan to Print] (If you do not want to change any
settings, go to step 5.).
1. Click [Settings] under the [Scan to Print] icon.
The [Scan to Print - Options] window appears.
2. Change the settings.
For details about the [Scan to Print - Options] window, refer to the ScanSnap
Manager Help.
To use the Quick Menu, you need to select the [Use Quick Menu] checkbox in the ScanSnap
setup window.
For details about how to perform scanning by using the Quick Menu, refer to "Using the Quick
Menu" (page 228)
Load another document in the ScanSnap when you want to scan multiple sheets. Scanning
starts automatically when a document is loaded.
