


Gemini User’s Manual
Upgrading Our Design
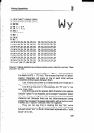
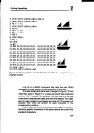
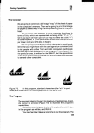
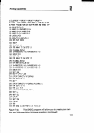
Before our ship sails, let’s add some portholes. Replace line 190
with:
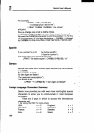
190 DATA 239,175,239,175,239,175,239,175,239,175,239,251
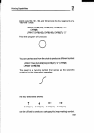
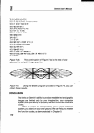
When you run the program again, you’ll produce the sailboats
shown in Figure 7-3. The lesson learned is that you can mix the
6 x 6 graphics with standard 9 x 9 characters.
These special characters in the block-graphics set can be
very useful in creating bar graphs, your organization’s logo, even -
detailed drawings. You could spend months experimenting with
the block-graphics set and still not exhaust the possibilities. But
before you embark on such an adventure, consider dot graphics,
which happens to be the next area of discussion.
GEMINI’S DOT GRAPHICS
As we learned in Chapter6, dot graphics commands allow you to
control the firing of individual pins in the print-head - in short,
these commands give you total control over your printer. That’s
the good news. The rest of the news is that you have to tell Gemini
where to place, exactly, every single dot. And there can be a lot
of dots in a dot graphics program. That’s like being given ocean-
front property, if you put every grain of sand, one by one, on the
beach. But wait, there’s more good news.
The computer you have interfaced with Gemini is a powerful
tool when it comes to moving large amounts of data. All you need
to do is tell your computer where you want dots placed, and it will - -
do most of the rest. It’s like getting the offer on the beach house
and having access to a dumptruck to help install the mountains
of sand.
In the conclusion to Chapter 7, we’ll develop a program that
will allow you to “draw” on an 6-l/2-by-1 l-inch sheet of paper. With
the program, if you specify where you want a line to begin and end,
the computer will fill-in the dots in between. It’s not altogether that
simple, but it’s not really that hard either.
One word of warning: Memory. Bit-image graphics (con-
structing images from individual dots, or bits) requires generous
memory capacities. In our example, we’ll need at least 16K of
memory. But there’s even good news in that: you can cut down
on the image area, as we’ll explain later.
108