


.4
Gem/n/ User’s Manual
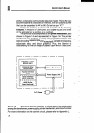
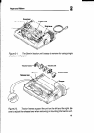
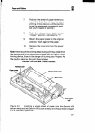
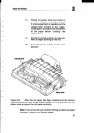
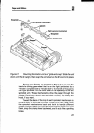
Note:After removing the tractor unit you’ll need to set the “release
lever” when you are ready to print single sheets. The release lever
is located on the left side of the printer (see Figure 2-2). This is
somewhat like shifting an off-road vehicle from two-wheel to four-
wheel drive. On the Gemini printers, you need to “shift” the release
lever forward so it aligns with the ‘7” for “tractor” when the tractor
unit is in use. But with the tractor unit removed, you need to shift
the release lever backward so it aligns with the ‘IF!’ (The “F” stands
for “Friction feed:’ which is the “drive” setting for single-sheet and
roll-fed paper.)
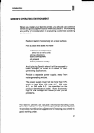
Inserting Single-Sheet Paper
-
-
-.
-
1.
2.
3.
4.
5.
6.
Make sure the paper is in straight.
15
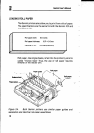
Turn the power “off:’
Make sure the release lever (on the left
side of the printer) is set in the “T”
position (which is the “open” mode for
inserting the paper; you’ll “close” it to
the “F” mode in a moment).
--
-
-
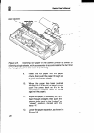
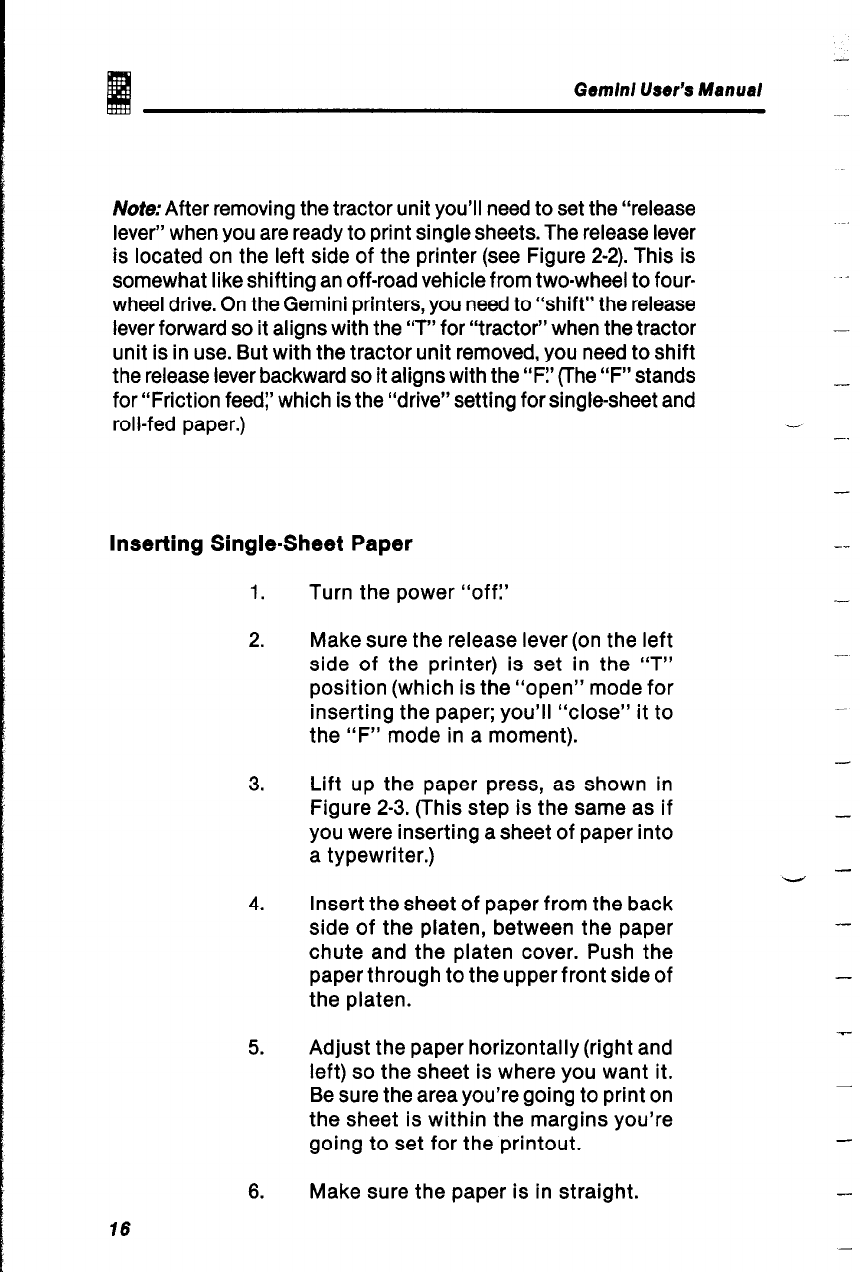
Lift up the paper press, as shown in
Figure 2-3. (This step is the same as if
you were inserting a sheet of paper into
a typewriter.)
-
Insert the sheet of paper from the back
side of the platen, between the paper
chute and the platen cover. Push the
paper through to the upper front side of
the platen.
-
-
Adjust the paper horizontally (right and
left) so the sheet is where you want it.
Be sure the area you’re going to print on
the sheet is within the margins you’re
going to set for the printout.
-