


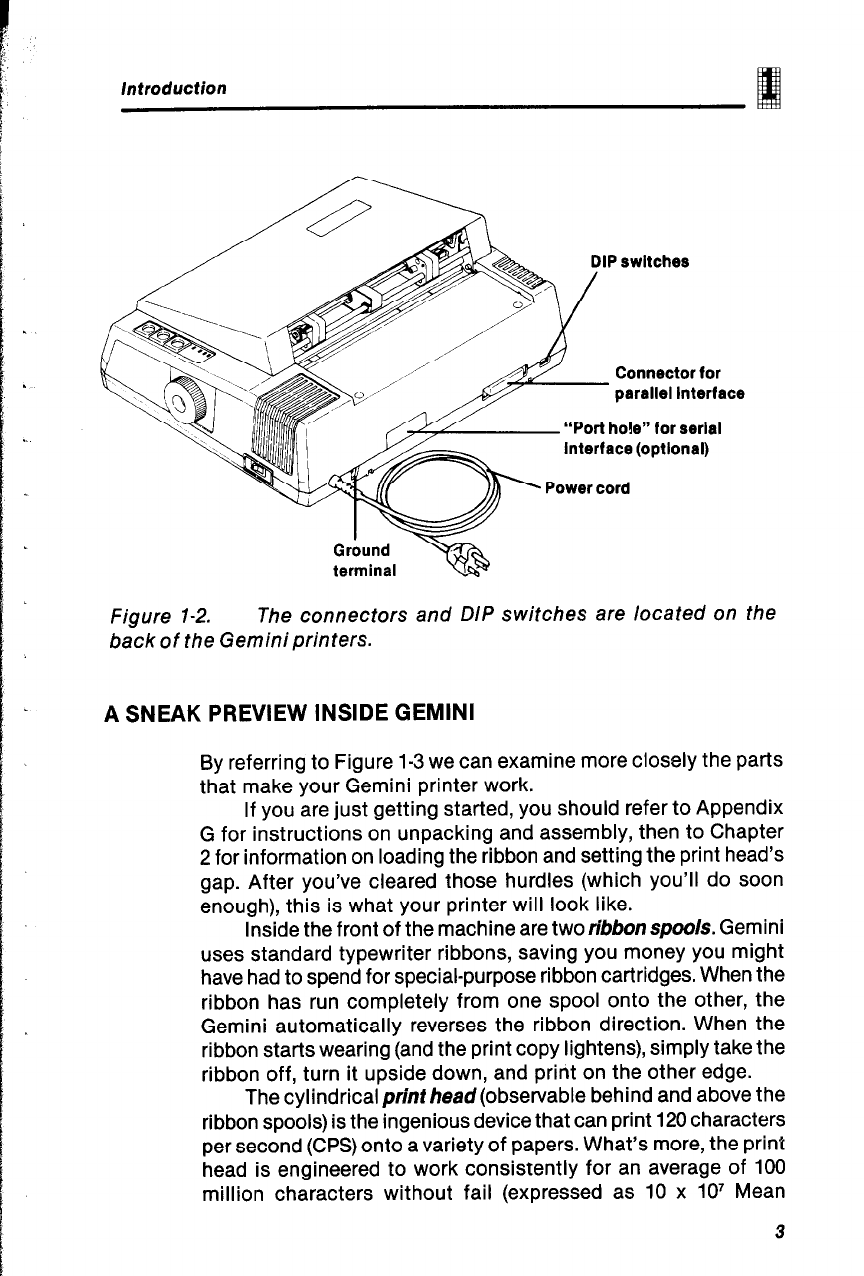
Introduction
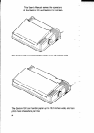
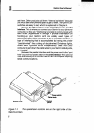
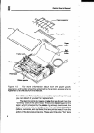
DIP switches
Connector for
parallel Interface
“Port hole” for serial
Interface (optlonal)
Grbund
terminal
-3%
Figure 1-2.
The connectors and DIP switches are located on the
back of the Gemini printers.
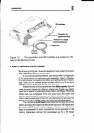
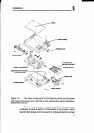
A SNEAK PREVIEW INSIDE GEMINI
By referring to Figure 1-3 we can examine more closely the parts
that make your Gemini printer work.
If you are just getting started, you should refer to Appendix
G for instructions on unpacking and assembly, then to Chapter
2 for information on loading the ribbon and setting the print head’s
gap. After you’ve cleared those hurdles (which you’ll do soon
enough), this is what your printer will look like.
Inside the front of the machine are two ribbon spoo/s. Gemini
uses standard typewriter ribbons, saving you money you might
have had to spend for special-purpose ribbon cartridges. When the
ribbon has run completely from one spool onto the other, the
Gemini automatically reverses the ribbon direction. When the
ribbon starts wearing (and the print copy lightens), simply take the
ribbon off, turn it upside down, and print on the other edge.
The cylindrical print head (observable behind and above the
ribbon spools) is the ingenious device that can print 120 characters
per second (CPS) onto a variety of papers. What’s more, the print
head is engineered to work consistently for an average of 100
million characters without fail (expressed as 10 x 10’ Mean
e
3