


PAPER AND RIBBON
With Chapter 1 now “imprinted” in your memory, you’re almost
ready to apply all these new discoveries about the Gemini printer.
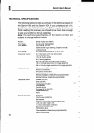
In this chapter, we’ll learn how to load paper into the printer, install
the ribbon, and set the print head gap. Chapter 3 will give you a
chance to print something; to see the results of what you’ve
learned so far. But first, let’s explore the options for loading
different types of paper.
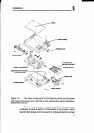
If you’ve borrowed a Gemini printer (until getting your own),
you should refer to Appendix G to learn how to attach the various
paper-feed accessories. Appendix G tells you what the new owner
gets when first opening the box and how all the pieces fit together.
This chapter assumes you know “how” the pieces fit together, and
you only need to learn “why:’
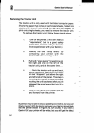
LOADING THE PAPER: INDIVIDUAL SHEETS
The Gemini printers are designed to accommodate individual
sheets -
whether it’s standard-size stationery, an off-size
memorandum, multilayer carbonless business forms, an envelope,
or almost any other single sheet.
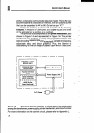
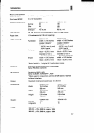
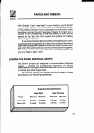
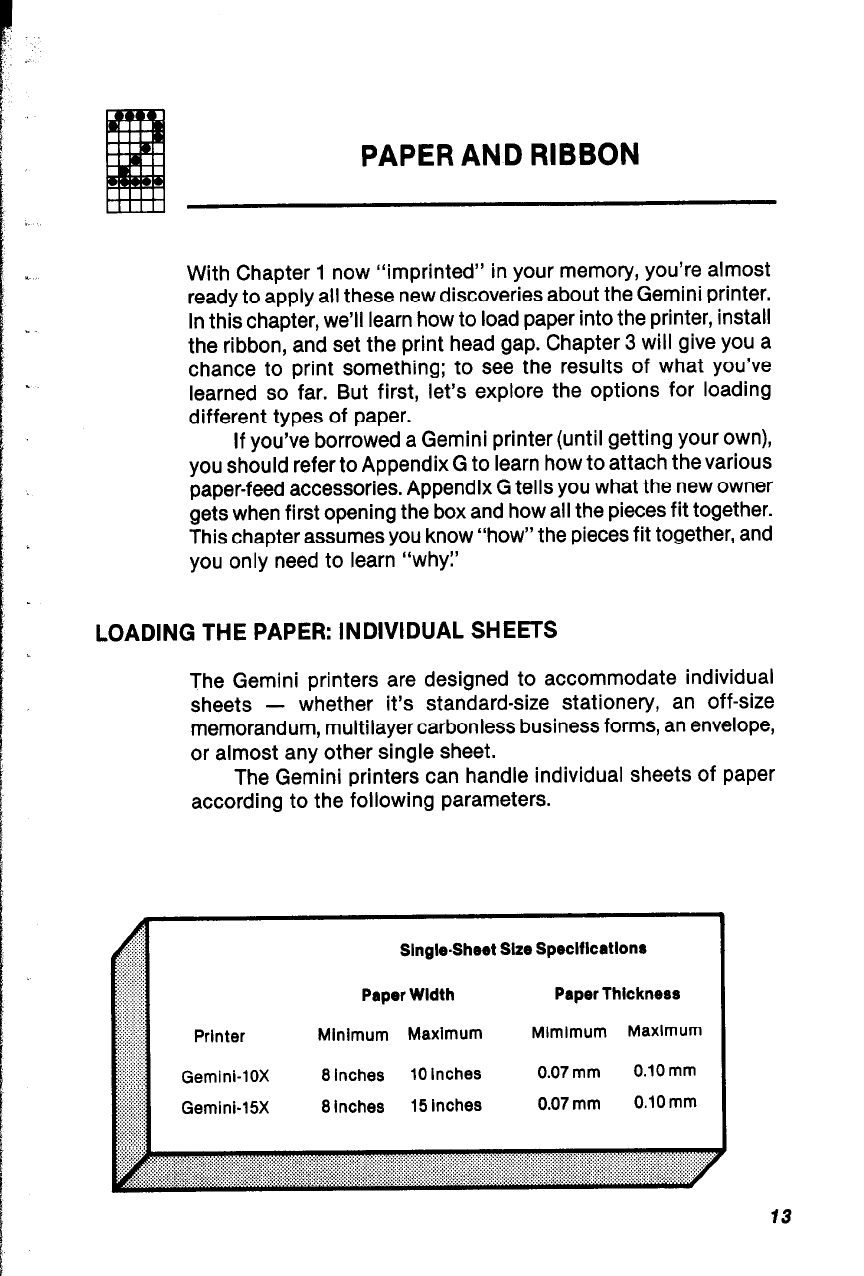
The Gemini printers can handle individual sheets of paper
according to the following parameters.
Prlnter
Gemini-lox
Gemlnb15X
SlngbShret Size Speclflcatlons
Paper Wldth
Paper Thickness
Minimum Maximum
Mlmimum Maximum
8 inches
10 inches
0.07 mm
0.10 mm
8 Inches
15 Inches
0.07 mm
0.10 mm
13