Chapter 12 Troubleshooting
101
3. Verify the power outlet is working.
4. Verify the Netserver and monitor are turned on.
The power-on indicator should be illuminated.
5. Verify the display's contrast and brightness settings are correct.
6. Verify all internal cables are properly connected and all boards firmly seated.
7. Verify the processor and its heatsink are fully seated in its socket on the
system board.
8. Verify the DIMMs are installed correctly and fully seated.
9. Verify the DIMM notches are aligned to the keys in the DIMM connector.
After Installing an Accessory:
1. Turn off the monitor, the Netserver, and any external devices.
2. Unplug all cables from the power outlet.
3. Remove the cover.
4. Check the following:
a. If you have installed an accessory board, verify the board is firmly seated
in its slot and any switches or jumpers on the accessory board are properly
set.
Refer to the documentation provided with accessory board.
b. Check all internal cabling and connections.
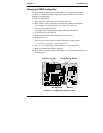
c. If you have changed any switches on the system board, verify each one is
properly set.
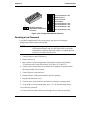
NOTE Only two of the eight switches on configuration switch are
used.
5. Replace the cover and connect all cables.
6. Turn on the monitor and Netserver.
7. If the Netserver still does not work:
a. Repeat steps 1, 2, and 3 of this section.
b. Remove all accessories, except the primary boot hard disk drive.
c. Replace the cover and connect all cables.
d. Turn on the monitor and the Netserver.


