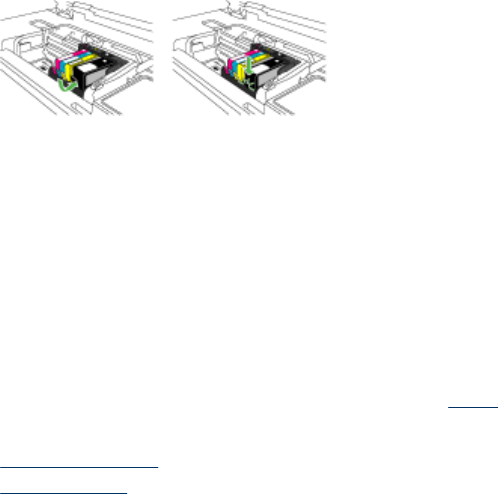
6. Install each ink cartridge in its slot. Press it down until the tab snaps into place.
Match the color and icon on each ink cartridge label to the color and icon on the slot
for that ink cartridge.
7. Close the ink cartridge access door, and check if the error has been resolved.
8. If you still receive the error message, turn the product off, and then on again.
Advanced printhead maintenance
If you are experiencing problems with printing, you might have a problem with the
printhead. You should perform the procedures in the following sections only when
directed to do so for resolving print quality issues.
Performing the aligning and cleaning procedures unnecessarily can waste ink and
shorten the life of the cartridges.
If you receive an error message about the ink cartridges, see
Errors for more information.
This section contains the following topics:
•
Clean the printhead
•
Align the printer
Clean the printhead
If your printed output is streaked or has any incorrect or missing colors, the printhead
might need to be cleaned.
This process uses ink to attempt to unclog and clean the nozzles in the printhead.
This might take a few minutes and will use one or more sheets of paper.
To clean the printhead from the control panel
1. Load letter, A4, or legal unused plain white paper into the main input tray.
2. Press Setup.
3. Press the down arrow button to highlight Tools, and then press OK.
4. Press the down arrow button to highlight Clean Printhead, and then press OK.
The product cleans the printhead.
5. Press any button to return to the Tools menu.
To clean the printhead from the Printer Toolbox
1. Load letter, A4, or legal unused plain white paper into the main input tray.
2. In the HP Solution Center, click Settings.
Work with ink cartridges 151
