The date and time linked to the newly created file will match the date and time on the device when the
scan occurred. Therefore, the date and time must be set correctly in order for the date and time of the
file to be correct.
If the scan fails for any reason (adf jam, cancel, etc…) the partial file is removed from the memory card.
However, if the memory card is removed while writing, a partial file may still exist on the card.
Error Conditions
Scanner Failures
If the paper jams in the ADF, or the paper is mispicked in the ADF, or the ADF door is opened while
scanning, then the scan to card is stopped. The partial file is removed from the memory card. All scanned
pages that were previously scanned remain on the memory card.
Cancel scan
If the user presses cancel while scanning to card, then the scan is stopped, and the partial file removed.
All scanned pages that were previously scanned remain on the memory card.
Memory card failures
If the memory card is read-only, then the device is unable to scan to it. An error message is displayed
when trying to scan to the card. Un-lock the card in order to scan to it.
If the memory card is removed while scanning to it, then the scan is stopped. A partial file may still exist
on the memory card.
If the memory card is corrupt, then the scan is stopped, and an appropriate error message is displayed.
Insert a valid memory card to continue scanning.
If the memory card is full, then the scan is stopped and an appropriate error message is displayed.
Delete files on the memory card or use a different card with sufficient available space to continue
scanning.
If the photo slots have been disabled an appropriate error message is displayed. Enable the photo slots
to continue scanning.
If there is no card inserted when trying to scan then an appropriate error message is displayed. Insert
a memory card to continue scanning.
Scan from the HP Scanning software
Use the HP Scanning software to initiate picture, document, and film scans. If you choose to preview
the scanned images or document pages in the HP Scanning window, you can adjust the image to
achieve the size and effect that you want.
The basic steps for scanning are:
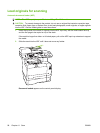
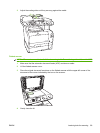
1. Place the original in the device. Look for the icons on the device to guide you in proper placement
of the original.
NOTE: If you place the original in the Automatic Document Feeder (ADF), you must put the media
into the feeder before you start a scan. Otherwise, scanning will occur from the scanner glass.
2. Select HP Color LaserJet CM2320 MFP Series in the HP Solution Center.
ENWW Use scan 105


