


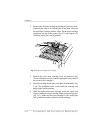

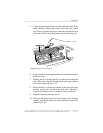
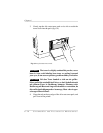
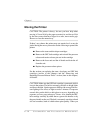

5. Locate the cleaning pad in the slot above the heat roller. Then,
while carefully avoiding the surface of the fuser unit, which
may be hot, grasp the pad by its center tab (towards the rear
of the unit), pull it out of the printer, and discard it (fig. 6.3).
6. Remove the new cleaning pad and the new oil bottle from their
protective bags.
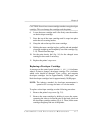
7. Holding the new cleaning pad by its center tab (towards the
rear of the unit), align the triangle mark on the pad with the
one on the fusing unit (fig. 2.17).
8. Being careful to avoid any hot surface in the fuser unit, slide
the new pad into the slot above the heat roller. The pad is
correctly positioned when it is centered snugly in the slot.
9. Snap the separator pawl unit closed.
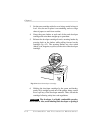
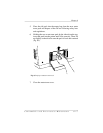
10. Pull open the spring latch on the outer edge of the oil bottle
retainer, and lift the retainer up and toward the center of the
printer (fig. 2.19).
Fig. 6.3 Remove the Cleaning Pad
Chapter 6
Consumables and Preventative Maintenance 6-13