


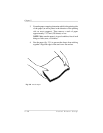
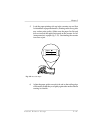


2. Connect the opposite end of the power cord to a grounded,
surge-protected, electrical outlet.
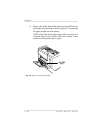
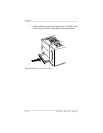
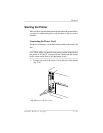
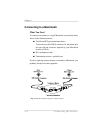
Using the Power Switches
There are two power switches on your printer, a main switch on
the rear and a remote switch (for convenience) on the front. Only
one switch has to be off to turn off the printer; however, both
switches must be on to turn on the printer. Turn on the back switch
by setting it to the on (|) position. Turn on the front switch by
pressing it in.
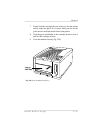
CAUTION: If the printer won’t be used for several days (such as
over a weekend), or if any maintenance work is done, make sure
at least one of the power switches is off. This reduces wear and
extends the life of the fuser.
When first turned on, the printer goes through an initialization
warm-up and self-testing period of approximately 4 minutes. Close
to the end of this process, the printer produces a start-up page (see
the next section for information on the start-up page). When
warm-up is complete, IDLE displays in the message window.
NOTE: If the start-up page does not print, see chapter 9,
“Troubleshooting.” Make sure you wait long enough for
the initialization process to finish.
The Start-up Page
When you initially turn on your printer, a start-up page prints in
approximately 4 minutes. This page gives basic information about
the printer, such as the printer’s name, the PostScript emulation
level and version, and various printer settings. For a detailed list of
Chapter 2
2-44 Initial Printer Setup