


7. If you didn’t remove a network interface board, skip to step
8. If you need to replace your network interface board
installed, follow the instructions below:
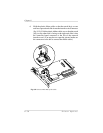
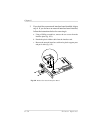
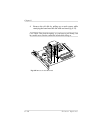
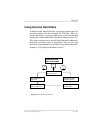
a. Snap the network interface card onto the plastic support posts
(fig. 8.18).
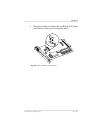
b. Using the two screws you removed earlier, refasten the interface
plate to hold the network card in place (fig. 8.18).
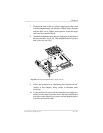
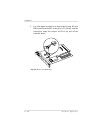
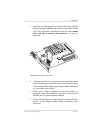
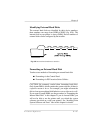
c. Hold the plastic ribbon cable so that the notch (key) on one end
faces upward and slide it onto the interface card connector (fig.
8.19).
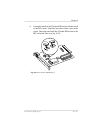
8. Make sure no components on the board shifted or loosened
during the procedure, especially the SIMMs.
9. Follow the instructions in “Replacing the Controller Board”
(earlier in this chapter), being careful to eliminate static
electricity.
10. Use the 50-pin to 36-pin cable included in your kit to connect
the Dataproducts cable to the parallel port.
Chapter 8
8-38 Printer Options