Management
10-18
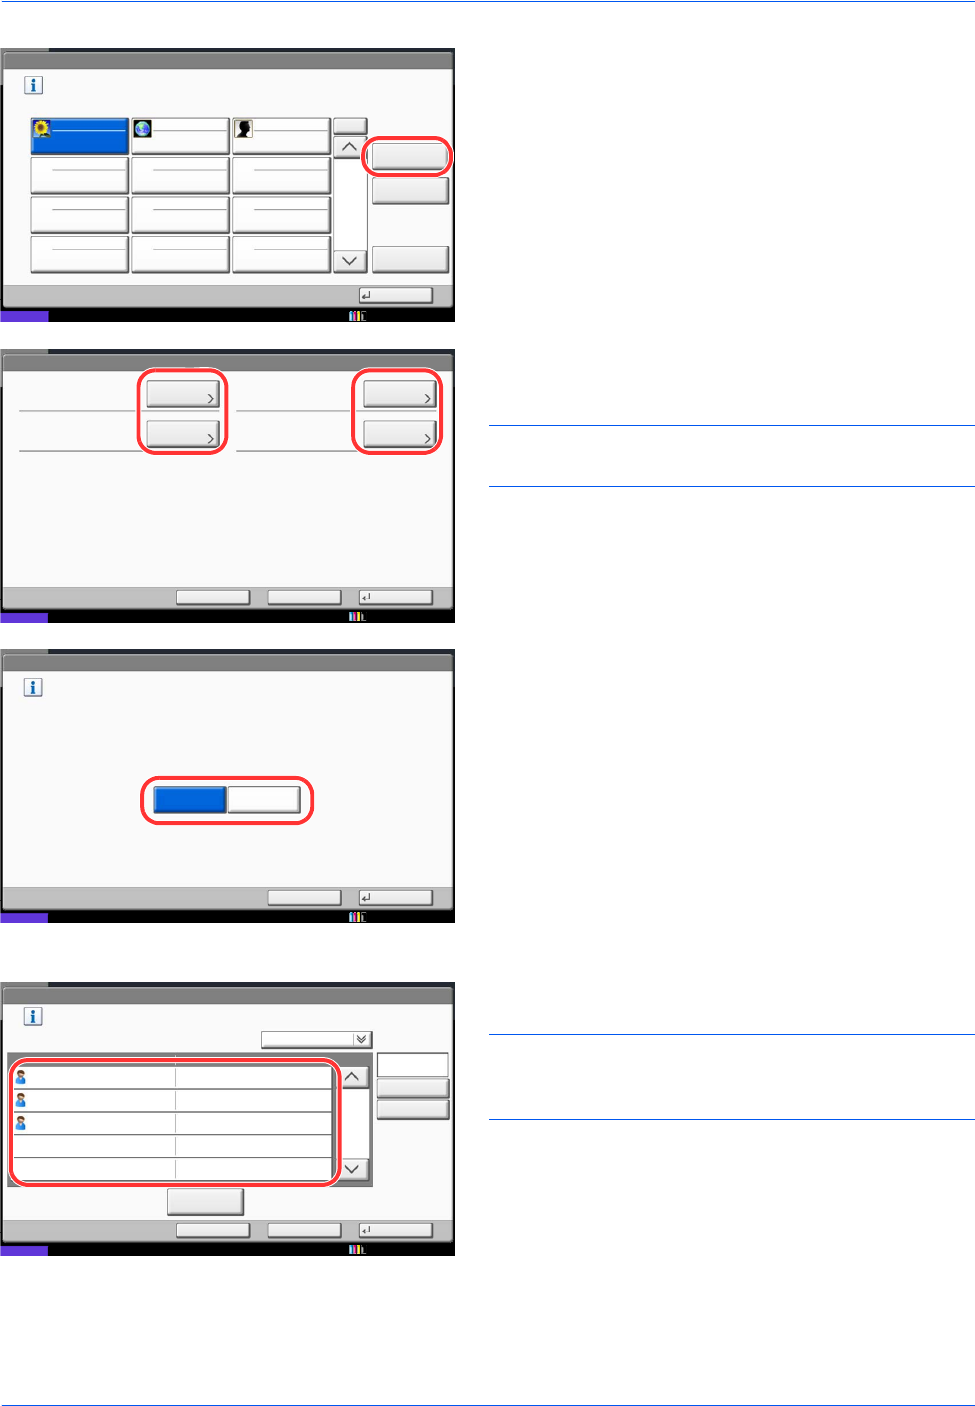
4 Press [Next] of User Login Setting, [Next] of Simple
Login Settings, and then [Next] of Simple Login
Key.
5 Press [Add/Edit].
6 Press [Change] in Display Name, enter the user
name to be displayed, and press [OK].
NOTE: Refer to the Character Entry Method on
Appendix-8 for details on entering characters.
7 Press [Change] of User.
8 To specify the user from local users, select [Local
User]. To specify from network users, select
[Network User]. Press [Next].
The next step varies depending on which
specification method you selected.
Specifying the user from local users
9 Select the user to be set for simple login.
NOTE: Destinations can be sorted or searched by
destination name or address number. Refer to
Specifying Destination on page 3-40 for Address List.
Status
Add or edit the Simple Login key.
01
No.
Detail
A
02
B
03
C
Close
Delete
Add/Edit
User Login/Job Accounting - Simple LoginKey
1/2
10/10/2010 10:10
Simple Login Key:
Display Name:
Save
Icon:Password Login:
Change
User:
Status
Change
Detail
Change
Cancel Back
**********
Guest Guest
10/10/2010 10:10
Simple Login Key: - User
Assing the user to the Simple Login key.
Select the user type.
Status
Cancel Next
Local User Network User
10/10/2010 10:10
Status
User Name
Detail
A
Sort
Name
OK
Search(Name)
Simple Login Key: - User
Select the user.
Search(Login)
Cancel Back
Login User Name
B
C
A
B
C
1/1
10/10/2010 10:10


