. . . Creating an Xchange Agent
123
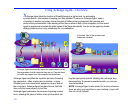
Using the Xchange Agent wizard
The wizard guides you through the process of selecting
pairs of folders to be synchronized. After naming and saving
the agent file, you can preview the agent and change its set
-
tings.
To make the files in each folder pair identical, click the Run
button on the toolbar.
NOTE There are two “modes” in Xchange Agent: edit and
preview. Certain operations are available in one mode and
not the other. To save an agent, for example, you must be
in edit mode. To change to edit mode from preview mode,
click the Close Preview button on the toolbar.
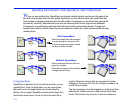
Using New Xchange Agent
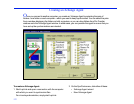
After choosing New Xchange Agent from the SyncTools
menu, you can select the pairs of folders to be synchronized
in two ways:
• On the Edit menu, click Add Folder Pair. After specify-
ing whether the synchronization is Local-Local or Local-
Remote, click a folder on each side of the window.
Repeat the procedure to add other folder pairs.
• Drag folders from File Transfer windows onto the
Xchange Agent window. Drag a folder first from one File
Transfer window, then from the other one. Repeat the
procedure to add other folder pairs.
Once you have selected the pairs to be synchronized, you
can do any of the following:
• Preview the agent: click the Preview button on the tool-
bar.
• Name and save the agent file: On the File menu, click
Save. In the File Name box, type a name, and click OK.
• Run the agent to make the files in each folder pair iden-
tical: click the Run button on the toolbar.
TIP Xchange Agent files are given the .LLX extension. In
Windows 95 and Windows 98, Windows ME, XP, 2000
and 2003, they are stored in the My Documents folder. In
Windows NT, they are stored in the \Profiles\your
-
name\Personal folder within the Windows folder (where
yourname is your Windows NT logon name).


