


Note: The amount of usable memory is reduced, depending on the system conguration. A certain
amount of memory must be reserved for system resources. To view the total amount of installed memory
and the amount of congured memory, run the Setup utility.
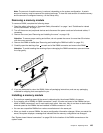
Removing a memory module
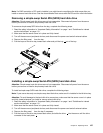
To remove a DIMM, complete the following steps:
1. Read the safety information in “Important Safety Information” on page 1 and “Guidelines for trained
service technicians” on page 115.
2. Turn off the server and peripheral devices and disconnect the power cords and all external cables, if
necessary.
3. Remove the cover (see “Removing and installing the cover” on page 119).
Attention: To ensure proper cooling and airow, do not operate the server for more than 30 minutes
with the cover removed.
4. Remove the DIMM air bafe (see “Removing and installing the DIMM air bafe” on page 121).
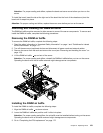
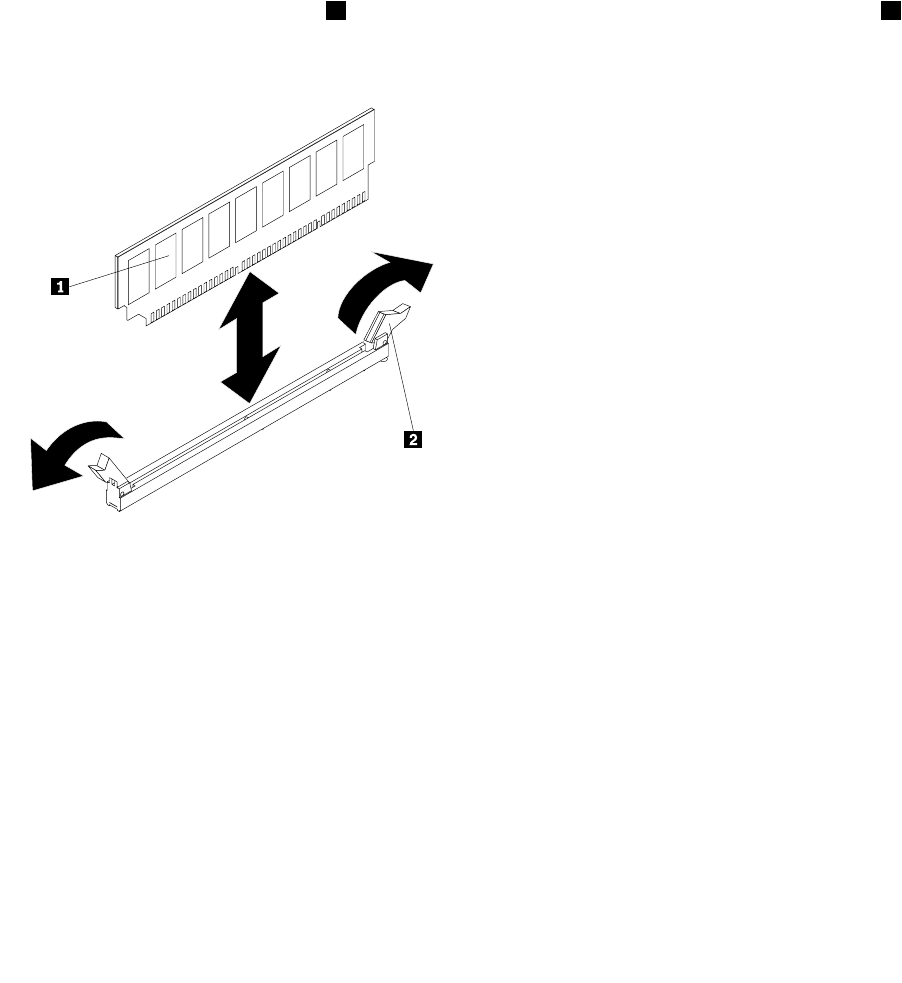
5. Carefully open the retaining clips 2 on each end of the DIMM connector and remove the DIMM 1
Attention: To avoid breaking the retaining clips or damaging the DIMM connectors, open and close
the clips gently.
6. If you are instructed to return the DIMM, follow all packaging instructions, and use any packaging
materials for shipping that are supplied to you.
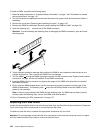
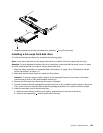
Installing a memory module
• The maximum operating speed of the server is determined by the slowest DIMM in the server.
• If you install a pair of DIMMs in DIMM connectors 2 and 5, the size and speed of the DIMMs that you
install in DIMM connectors 2 and 5 must match each other. How ever, they do not have to be the same
size and speed as the DIMMs that are installed in DIMM connectors 1 and 4.
• You can use compatible DIMMs from various manufacturers in the same pair.
• When you install or remove DIMMs, the server conguration information changes. When you restart the
server, the system displays a message that indicates that the memory conguration has changed.
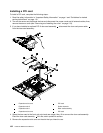
See “System-board internal connectors” on page 108
for the location of the DIMM connectors on the
system board.
Chapter 6. Replacing FRUs 125