


000000000
000000000
000000000
000000000
000000000
000000000
00000
00000
00000
000
000
000
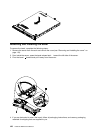
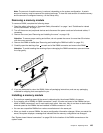
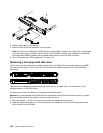
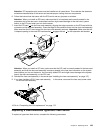
6. Release the loops of the drive tray.
7. Insert the ller panel into the bay to cover the drive.
Note: If the server is congured for RAID operation using a RAID controller, you might have to recongure
your disk arrays after you install hard disk drives. See the RAID controller documentation for additional
information about RAID operation and complete instructions for using the RAID controller.
8. Go to “Completing the FRU replacement” on page 172.
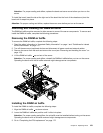
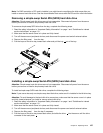
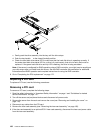
Removing a hot-swap hard disk drive
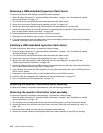
The 3.5-inch drive hot-swap server models support either two SAS 3.5-inch hard disk drives or two SATA
3.5-inch hard disk drives. The 2.5-inch drive hot-swap server models support four 2.5-inch SAS hard
disk drives.
The removal and installation procedures are the same for any of these drives. The illustrations in this
procedure show 3.5-inch SAS drives.
To remove a hot-swap hard disk drive, complete the following steps.
Attention: To avoid damage to the hard disk drive connectors, make sure that the server cover is in place
and fully closed whenever you install or remove a hard disk drive.
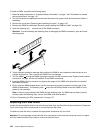
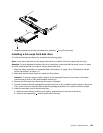
1. Move the handle 1 on the drive to the open position (perpendicular to the drive).
2. Slide the release latch (gray on 3.5-inch hard drives and orange on 2.5-inch hard drives) gently to the
left to unlock the drive handle.
128 Hardware Maintenance Manual