


1
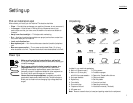
Installation
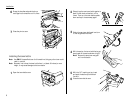
Pick an installation spot
Where should you install your fax machine? The location should be:
• Clean — Dust buildup can damage your machine. (However, do not use a cover!)
• In the open — Allow at least 12 inches (30 cm) of clearance around your
machine. Be sure that you never cover the machine. Its vents must be able to
“breathe.”
• Away from direct sunlight — This helps avoid overheating.
• Dry — Avoid any location where splatters or sprays (such as from a water foun-
tain) could reach your fax machine.
• Level, and vibration-free.
• Near a phone jack — Your fax machine uses a standard (modular) telephone
jack.
• Near an
AC
power outlet — The
AC
power cord is about 5 feet (1.5 m) long
when stretched to its limit. The power cord should never be stretched to its limit.
Power tips
• Make sure the outlet isn’t controlled by a wall switch.
If it is, you’ll risk occasional shutoffs to the machine, causing you
to lose fax messages.
• Don’t use an outlet which also is supplying power to a
large appliance, such as a refrigerator or air conditioner.
Such high-consumption appliances can cause “draw-downs”
(temporary drops in the power available for other equipment on
the circuit) which could damage your fax machine.
• Use an electrical surge suppressor, preferably one, which
guards both telephone and electrical lines. This device helps to
shield your fax machine from damaging high-voltage electrical
surges.
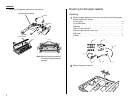
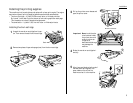
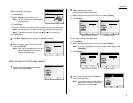
Unpacking
Included in your machine’s packaging:
❑ Main unit (Scanner part) ❑ Fixing screws
❑ Main unit (Printer part) ❑ Protection sponges
with Multi purpose cassette ❑ Paper size / Cassette No. stickers
❑ 2nd paper cassette ❑ One-touch labels
❑ Bypass tray ❑ Soft Key labels
❑ Toner bottle ❑ Function icon label
❑ Drum cartridge ❑ Operating instructions
❑ Telephone line cord ❑ Installation manual (This book)
❑ AC power cord
Note: Be sure to save the box (or boxes) and packing materials for reshipment.
Main unit (Scanner unit) Main unit (Printer unit)
Drum cartridge
Telephone line cord AC power cordToner bottle
Paper size / Cassette No.
stickers
One-touch labels
Soft Key labels Operating instructions
2nd paper cassette
Bypass tray
Fixing screws Protection sponges
Installation Manual
Function icon label
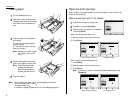
1
2
3
4
5
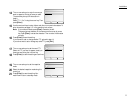
COPY MENU
OPTIONS
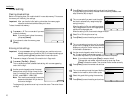
Setting up