Scanning_ 76
1. From the Start menu, click Control Panel > Samsung Scan Manager.
You can open Samsung Scan Manager by right clicking the Smart
Panel icon in the Windows task bar and seleting Scan Manager.
2. Select th
e appropriate machine from the Samsung Scan Manager
window.
3. Press Properties.
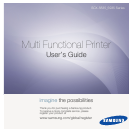
4. The Set Scan Button tab allows you to change the saving destination
and scan settings, add or delete application program, and format files.
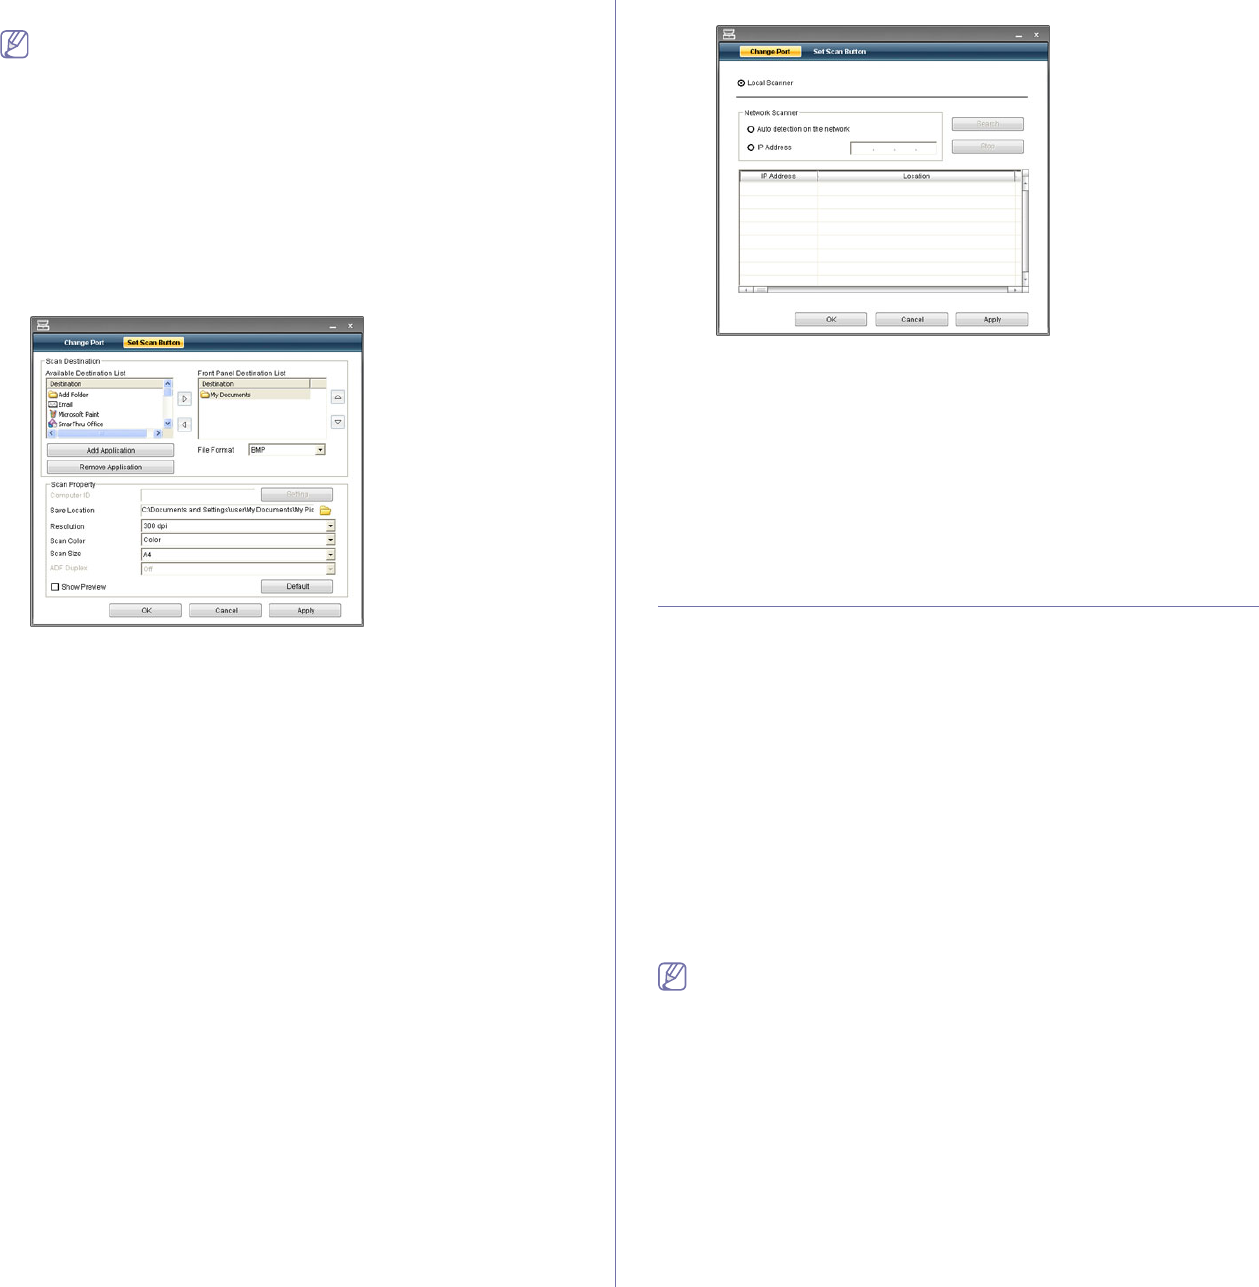
You can change the scanning machine by using the Change Por
t tab.
(Local or Network)
5. Whe
n setting is done, press OK.
Set Scan Button tab
Scan Destination
• Available Destination List : Shows the list of applications currently
linked to scanned images in the PC’s registry. Select the program
you want to use and click the right arrow and add to Front Panel
Destination List.
• Fr
ont Panel Destination List : Shows the list of applications to
open scanned image.
• Add Applic
ation : Allows you to add application you want to use to
Available Destination List,
• Remove Application : Allows you to remove an item added by the
user in the Available Destination List.
• F
ile Format : Allows you to select the form of scanned data to be
saved. You can choose among BMP, JPEG, PDF, and TIFF.
Scan Property
• Computer ID : Shows the ID of your computer.
• Sa
ve Location : Allows you to choose the location of the default
saving folder.
• Res
olution : Allows you to choose the scan resolution.
• Scan
Color : Allows you to choose the scan color.
• Scan
Size : Allows you to choose the scan size.
• ADF D
uplex : Automatically scans both sides. If your model does
not support this option, it will be grayed out.
• Show Preview : Checking this box allows you to preview applied
scan
options. You can modify the options before scanning.
• Default : Allows you to go back to default options.
Change Port tab
Local Scanner
Select when your machine is connected via USB or LPT port.
Network Scanner
Select when your machine is connected via network port.
• Auto detection on the network : Automatically detects your
machine.
• IP ad
dress : Enter in your machine’s IP address to detect your
machine.
CHANGING THE SCAN FEATURE SETTINGS
This section explains how to adjust the document settings for each scan job,
such as resolution, duplex, original size, type, color mode, darkness, and
more. The settings you change will be maintained for a certain time, but
after that period, the options will be reset to default values.
Duplex
This feature especially applies when the original documents to be scanned
are two sided. You can select whether the machine scans only one side or
both sides of the paper.
Press Scan > Scan to Email (or Scan to PC or Scan to Server) > the
Basic tab > Duplex. Use left/right arrows to toggle the values.
• 1 Sid
ed : For originals that are printed on one side only.
• 2 Sid
ed : For originals that are printed on both sides.
• 2
Sided, Rotate Side 2 : For originals that are printed on both sides, but
the back is rotated 180 degrees.
To use 2 Sided and 2 Sided, Rotate Side 2, load the originals on the
document feeder. If the machine cannot detect the original on the
document feeder, it automatically changes the option to 1 Sided.
Resolution
You can adjust document resolution.
Press Scan > Scan to Email (or Scan to PC or Scan to Server) > the
Basic tab > Resolution. Use left/right arrows to toggle the values. The
higher value you select, clearer the result. But the scanning time may take
longer.
100 dpi, 200 dpi and 300 dpi resolution are available only when Color Mode
is set to Color or Gray.