


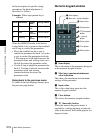

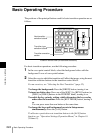


225Basic Operating Procedure
Chapter 3 Transitions
3
For the transition to change the key priority, set the priority for after the
transition.
For details of the key priority, see “Selecting the key priority” (page 34).
For details of the key priority setting operation, see “Key Priority Setting”
(page 227).
4
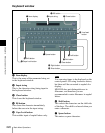
Select the new video used for the transition.
• In the background B row of cross-point buttons, select the new
background video.
• When inserting a key, select the key signal, and make any required
settings.
For details of key settings, see Chapter 4 “Keys” (page 261).
To carry out a cut transition, skip to step 7; otherwise continue to step 5.
5
Select one of the transition type selection buttons in the transition control
block.
To carry out a dissolve to the new video: Press one of the [MIX],
[NAM], [SUPER MIX], and [PST COLOR MIX] buttons, turning it
on.
To carry out a wipe: Press the [WIPE] or [DME] button, turning it on.
You can also use the Misc>Transition menu to select a desired transition
type for the M/E or PGM/PST bank. (See “Selecting the Transition Type
by a Menu Operation” (page 232).)
For an overview of the transition types, see “Transition Types” (page 39).
6
Make the required settings, according to the selected transition type.
For details of the settings, see the relevant section.
Super mix: “Super Mix Settings” (page 233)
Preset color mix: “Color Matte Settings” (page 234)
Wipe: “Basic Procedure for Wipe Settings” (page 304)
DME Wipe: “Basic Procedure for DME Wipe Settings” (page 332)
Using the transition preview function (page 247), you can check the
transition on the preview monitor.
7
Carry out the transition in the transition execution section.
For a gradual transition such as a mix (dissolve) or wipe: Press the
[AUTO TRANS] button, or operate the fader lever.
To execute a transition by pressing the [AUTO TRANS] button, first
set the transition rate (specified as the duration of the transition).
(See “Setting the Transition Rate” (page 236).)