Chapter 3 Maintaining the Sun Fire X4100 Server 3-19
3.4.4 Installing a DVD-ROM Drive Upgrade Kit
■ Follow these steps to install a DVD-ROM upgrade kit to a system that previously
did not have a DVD-ROM drive.
■ If you are removing and replacing an existing DVD-ROM drive, see Section 3.4.3,
“Replacing the DVD-ROM Drive” on page 3-16.
Note – This component is a FRU and should be replaced only by qualified service
technicians. Contact your Sun Service representative for assistance.
TABLE 3-3 lists the qualified part numbers for this component. These part numbers
are subject to change over time. For the most up-to-date list of replaceable
components, product updates, and downloads, see the following URL:
http://www.sun.com/servers/entry/x4100/downloads.jsp
1. Power off the server as described in Section 3.2.1, “Powering Off the Server” on
page 3-2.
2. If the server is in a rack, slide it far enough from the rack so that you can remove
the main cover and front cover. If you cannot safely view and access the
component, remove the server from the rack.
3. Remove the main cover as described in Section 3.2.2, “Removing the Main Cover”
on page 3-3.
4. Remove the front bezel as described in Section 3.2.3, “Removing the Front Bezel”
on page 3-4.
Note – Always unfasten the bezel’s securing screw before removing the bezel.
5. Remove the front cover as described in Section 3.2.4, “Removing the Front Cover”
on page 3-5.
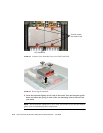
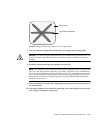
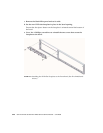
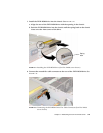
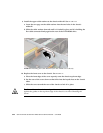
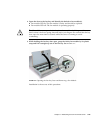
6. Install the DVD-slot faceplate to the front bezel. See
FIGURE 3-16:
a. Lay the bezel face-down on a work surface.
b. Use a No. 2 Phillips screwdriver to remove the two screws that secure the blank
filler panel to the bezel. Save the screws in a safe place because you will
reinstall them in a following step.
TABLE 3-4 Sun Fire X4100 Supported DVD-ROM Upgrade Kit Part Numbers
Component Part Number
DVD-ROM Upgrade Kit X8030A-Z


