


136
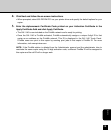
PrintMe Activation Guide
: You can also activate the PrintMe service when the PS3 Scan & HDD Upgrade (GE-1060+GE-
1110) is installed. This section explains the PrintMe activation process for the TOSHIBA GA-
1140.
DNS Setup Options
Use the DNS Setup options to translate domain names into IP addresses. This option must be enabled
to use PrintMe Services.
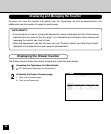
To Access DNS Setup Options
1. With the copier on, press the Network/Printer button, located to the left of the Touch
Panel.
2. On the Touch Panel, press ON/OFF and then press OFF LINE.
3. Press SETTING and then press ADMIN.
• Enter the administrator password, if one has been set.
PrintMe sets the standard in Internet printing, giving people everywhere the freedom to print their e-mail
messages, Internet content, and other documents from any device to the GA-1140, anywhere, anytime.
For more information about PrintMe, go to www.printme.com.
NOTE: Jobs sent with a PrintMe account are only sent through the GA-1140 Direct connection and not
through any other network printing queues such as the Print queue and Hold queue. This document
explains the PrintMe activation process and should be completed in the following order:
• Specify DNS Setup options from the GA-1140 Touch Panel.
• Specify PrintMe Setup options from the GA-1140 Touch Panel.
• Activate PrintMe Services on www.printme.com.
NOTE: If you have not already specified TCP/IP settings for the GA-1140 you must do so now, before
you can proceed with PrintMe Setup.
NOTE:
If you need more information about PrintMe Service, please ask your Toshiba dealer.