


40
: The Hold queue and Print queue are only available when the PS3 Scan & HDD Upgrade (GE-1060+GE-1110) is
installed.
5. Press the Esc key to close the Print Queues window.
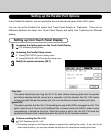
6. Select Print Server Information from the Available Options menu and press the Enter key.
• The Print Servers window appears.
7. Press the Insert key and enter a print server name and press the Enter key.
8. Select created print server name from the Print Servers window and press the Enter key.
• The Print Server Information menu appears.
9. Select Print Server Configuration from the Print Server Information menu and press the Enter key.
• The Print Server Configuration menu appears.
10. Select Printer Configuration from the Print Server Configuration menu and press the Enter key.
• The Configured Printers window appears.
11. Select a printer number and press the Enter key.
• The Printer Configuration window appears.
12. Select the Name field and enter a printer name.
13. Select the Type field and press the Enter key.
• The Printer types windows appears.
14. Select Remote Other/Unknown and press the Enter key.
15. Press the Esc key. In the Save changes window, select Yes and press the Enter key.
16. Confirm the created printer is added to the Configured Printers window and press the Esc key.
• The screen returns to the Print Server Configuration menu.
17. Select Queue Serviced by Printer from the Print Server Configuration menu.
• Defined Printers window appears.
18. Select the created printer from the Defined Printers window and press the Enter key.
19. Press the Insert key.
• The Available Queues window appears.
20. Select a queue and press the Enter key.
• Up to 10 queues can be selected. If you created several queues, repeat the operation to add all queues that are
required.
• When more than 1 queue is added, you must enter the priority value.
21. Press the Esc key until the Exit PConsole menu appears.
22. Select Yes and press the Enter key.