


47
Setting up the
Network Setup
Options
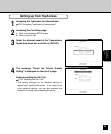
1
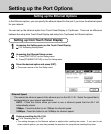
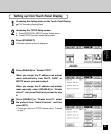
Accessing the Setting menu on the Touch Panel Display.
P18 “Accessing Setting Menu”
2
Accessing the TCP/IP Setup screen.
1. Press [PROTOCOL SETUP] on the Setting menu.
2. Press [TCP/IP] on the Protocol Setup menu.
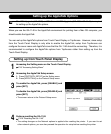
3
Press [ETHERNET].
• Ethernet options screen is displayed.
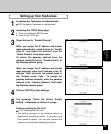
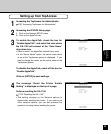
4
Press [ENABLE] for “Enable TCP/IP”.
When you assign the IP address and subnet
mask automatically from DHCP, RARP, or
BOOTP server, proceed to step 5.
When you assign the IP address and subnet
mask manually, select [DISABLE] for “Enable
Auto IP” and press [Next] and proceed to step
6.
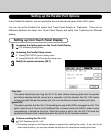
Setting up from Touch Panel Display
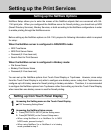
5
Press [ENABLE] for “Enable Auto IP”, select
the protocol from “Select Protocol”, and then
press [SET].
• The screen returns to TCP/IP options menu. Proceed
to step 7.