


54
Setting up the Print Services
Setting up the NetWare Options
NetWare Setup allows you to enter the names of the NetWare objects that are concerned with GA-
1140 print jobs. When you configured the NetWare server for Novell printing, you should set up NDS
(Novell Directory Services), Bindery Services, or both according to the NetWare configurations in order
to enable printing through the NetWare server.
Before setting up the NetWare options on GA-1140, prepare for following information which is required
for setup:
When the NetWare server is configured in NDS/NDPS mode:
• NDS Tree Name
• NDS Print Server Name
• Password (if it has been set)
• Search Root for Print Queues
When the NetWare server is configured in Bindery mode:
• File Server Name
• Bindery Print Server Name
• Password (if it has been set)
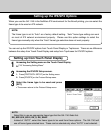
You can set up the NetWare options from Touch Panel Display or TopAccess. However, since setup
from the Touch Panel Display is only able to configure one bindery server, setup from TopAccess can
configure up to 8 bindery severs for Novell printing in bindery emulation. Therefore, it is recommended
to configure the NetWare options from TopAccess rather than setting up from the Touch Panel Display
when more than one bindery server is used for Novell printing.
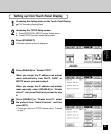
Setting up from Touch Panel Display
1
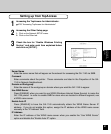
Accessing the Setting menu on the Touch Panel Display.
P18 “Accessing Setting Menu”
2
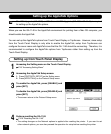
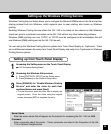
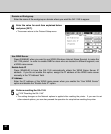
Accessing the NetWare Setup screen.
1. Press [PROTOCOL SETUP] on the Setting menu.
2. Press [NETWARE] on the Protocol Setup menu.
• When using NetWare 4.x or NetWare 5.x in NDS/
NDPS mode, proceed to step 3.
• When using NetWare 3.x or NetWare 4.x in bindery
mode, proceed to step 5.