


CHAPTER 3 DISASSEMBLY & REASSEMBLY
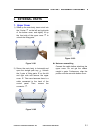
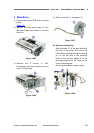
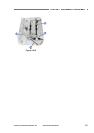
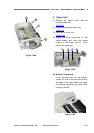
4) Remove the grounding plate
{
1
. Remove
the screw
{
2
(M3, self-tapping) and
remove the grounding plate
{
3
. Next,
remove the cable
{
4
from the cable guide.
Then, unhook the 3 pairs of fitting parts
{
5
and remove the lower light guide
{
6
.
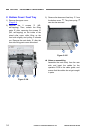
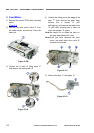
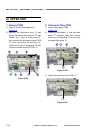
5. Straight Eject Roller (Drive)
1) Remove the feed motor (with belt).
(Page 3-6)
2) Remove the lower light guide by referring
to the section on the registration roller
(drive).
(Page 3-7)
3) Remove the main motor (with belt).
(Page 3-5)
4) Unhook the fitting part at the edge of the
gear
{
1
, then remove the gear and
bearing.
Figure 3-216
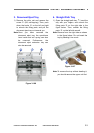
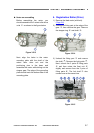
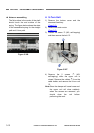
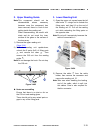
5) Loosen the screw
{
1
(M3, self-tapping)
and then remove the belt
{
2
. Next,
unhook the fitting part at the edge of the
gear
{
3
, and remove the gear and the
bearing. Then, remove the registration
roller
{
4
.
Figure 3-218
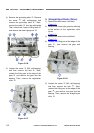
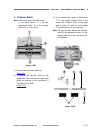
5) Loosen the screw
{
1
(M3, self-tapping)
and then remove the belt
{
2
. Next,
unhook the fitting part at the edge of the
gear
{
3
, and remove the gear and the
bearing. Then, remove the straight eject
roller
{
4
.
Figure 3-217
3-8
COPYRIGHT
©
CANON ELECTRONICS INC. 2011 CANON DR-M140 FIRST EDITION