


1
1
INTRODUCTION
The Switch can be managed through the Switch’s serial port, Telnet, or the Web-based management agent. The Command Line
Interface (CLI) can be used to configure and manage the Switch via the serial port or Telnet interfaces.
This manual provides a reference for all of the commands contained in the CLI. Configuration and management of the switch
via the Web-based management agent is discussed in the User’s Guide.
Accessing the Switch via the Serial Port
The Switch’s serial port’s default settings are as follows:
• 9600 baud
• no parity
• 8 data bits
• 1 stop bit
A computer running a terminal emulation program capable of emulating a VT-100 terminal and a serial port configured as
above is then connected to the Switch’s serial port via an RS-232 DB-9 cable.
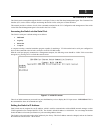
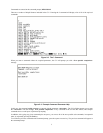
With the serial port properly connected to a management computer, the following screen should be visible. If this screen does
not appear, try pressing Ctrl+r to refresh the console screen.
Figure 1-1. Initial CLI screen
There is no initial username or password. Just press the Enter key twice to display the CLI input cursor − DES-3550:4#. This is
the command line where all commands are input.
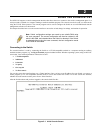
Setting the Switch’s IP Address
Each Switch must be assigned its own IP Address, which is used for communication with an SNMP network manager or other
TCP/IP application (for example BOOTP, TFTP). The Switch’s default IP address is 10.90.90.90. You can change the default
Switch IP address to meet the specification of your networking address scheme.
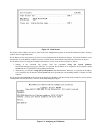
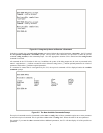
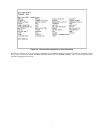
The Switch is also assigned a unique MAC address by the factory. This MAC address cannot be changed, and can be found on
the initial boot console screen – shown below.