Actions (for Windows Users)
133
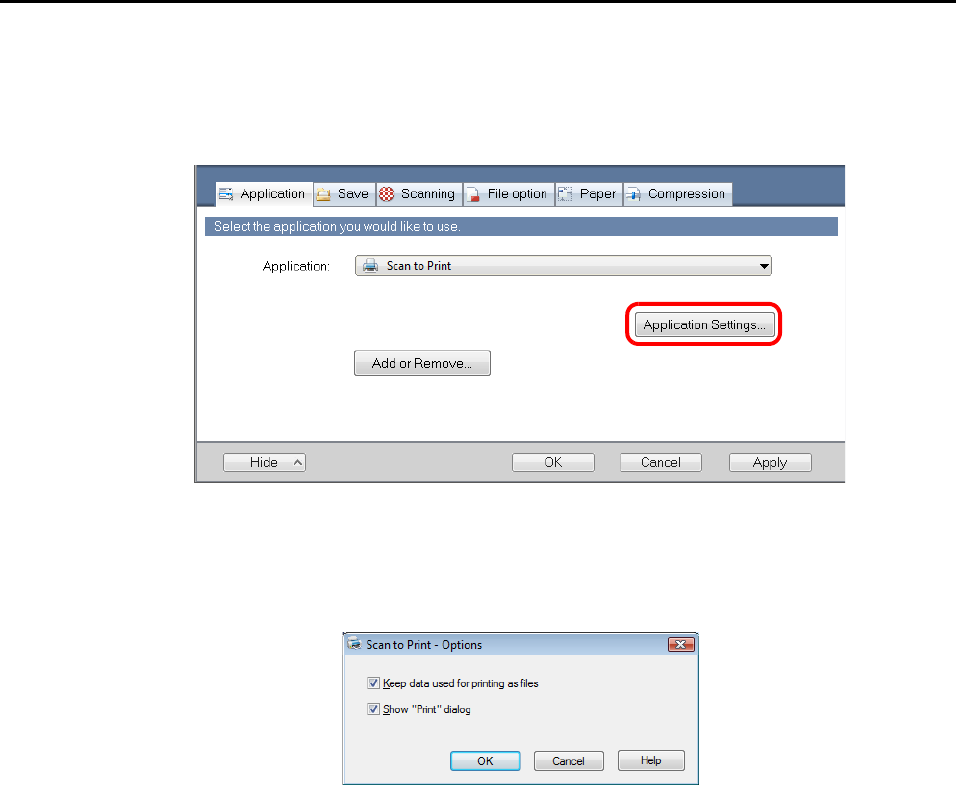
3. Change the settings for [Scan to Print] (If you do not want to change any
settings, go to step 4.).
1. Click the [Application Settings] button.
D The [Scan to Print - Options] dialog box appears.
2. Change the settings.
For details about the [Scan to Print- Options] dialog box, refer to the ScanSnap
Manager Help.
3. Click the [OK] button to close the [Scan to Print - Options] dialog box.
4. Click the [OK] button to close the ScanSnap setup dialog box.
5. Load a document in the ScanSnap.
For details about how to load documents, refer to "How to Load Documents" (page 33).
6. Press the [Scan] button on the ScanSnap to start a scan.
D The [Scan to Print] dialog box appears when the scanning is completed.
If the [Show "Print" dialog] check box is cleared in step 3., printing is immediately
performed.


