9-11
To print envelopes using the optional envelope feeder, follow these steps:
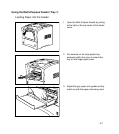
1. Load the envelope into the envelope feeder:
• Install the envelope feeder according to the instructions in Step 10d of Chapter 1 of this
manual.
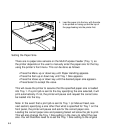
• Adjust the paper size guides to the correct size for the envelopes being used.
• Place the envelope(s) into the feeder, with the side to be printed on facing up, the flap on the
right and the short edge facing into the printer.
• Up to 75 envelopes can be loaded at one time. The feeder can also handle 100 sheets of
Postcard sized paper. Do not overload the feeder.
2. Format and send the print job:
Macintosh:
• Open the application you wish to print from. Go to the File menu and then down to Page
Setup.
• Click on the Paper pull-down menu and set the correct paper size for the envelope you are
using. Click OK.
• Type out the address information into the document. Consult the documentation for the
application being used for specific information on formatting for envelopes.
• Go to the File menu and down to Print.
• Under “Paper Source,” set the source to Envelope Feeder.
• Set any other print options for the job to the desired settings, and click Print to send the job.
Windows (all versions):
• Open the application you wish to print from. Go to the File menu and then down to Page
Setup.
• Click on the Paper pull-down menu and set the correct paper size for the envelope you are
using. Under Paper Source, set the source to Envelope Feeder. Click OK.
• Type out the address information into the document. Consult the documentation for the
application being used for specific information on formatting for envelopes.
• Go to the File menu and down to Print.
• Set any other print options for the job to the desired settings, and click Print or OK to send the
job.
Note: If Envelope Feeder does not appear as a paper source option, make sure that all the
steps at the end of Step 10d of Chapter 1 of this manual (Configuring Printer Drivers for Use of
the Envelope Feeder) have been followed.


