1-42
standard RAM; the Elite 21 SE ships with 64MB standard.
Hard Drive Configuration (Elite 21 SE only)
The Elite 21 SE ships with a standard 4GB hard drive pre-installed. The PPD
file for the Elite 21 Series, however, defaults to “Not Installed” for the hard drive
option. Users of the Elite 21 SE model will therefore need to change the driver
configuration to reflect the presence of the hard drive, as follows:
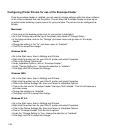
Macintosh:
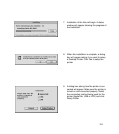
• Click once on the desktop printer icon for your printer to highlight it.
• Go to the Printing menu at the top of the screen, then down to “Change Setup...”
• In the Setup window, click on the “Change” pull-down menu and go down to “Internal Hard
Disk.”
• Change the setting in the “To:” pull-down menu to “Installed.”
• Click OK to accept the change.
Windows 95/98:
• Go to the Start menu, then to Settings and Printers.
• Right-click the printer icon for your Elite 21 printer and select Properties.
• Click on the Device Options tab.
• Under Installable Options, click on “Internal Hard Disk.”
• Under “Change Setting for:,” change the selection to “Installed.”
• Click Apply and OK to accept the change.
Windows 2000:
• Go to the Start menu, then to Settings and Printers.
• Right-click the printer icon for your Elite 21 printer and select Properties.
• Click on the Device Settings tab, then scroll down to “Installable Options.”
• Click on the link next to “Internal Hard Disk.” This link will become a pull-down menu.
• Change the selection to “Installed.”
• Click Apply and OK to accept the change.
Windows NT 4.0:
• Go to the Start menu, then to Settings and Printers.
• Right-click the printer icon for your Elite 21 printer and select Properties.
• Click on the Device Settings tab, then scroll down to Installable Options.
• Click on “Internal Hard Disk” from the list of options.
• Under the “Change Setting to:” box, change the selection to “Installed.”
• Click Apply and OK to accept the change.


